Tag Archives: Cane sugar free

Cheer Up with Maple Syrup – and a Skillet Chocolate Chip Cookie

Hi everyone! I hope that you are enjoying (or at least tolerating) the snowy and cold winter weather. Sensitive Husband and I have been busy stimulating the economy by purchasing real estate and a number of various services that go along with it. I must say, based on our recent house-buying experience, that the housing market is beginning to pick up, although slowly. The number of buyers is increasing, although some service providers are still clambering for work. For example, mortgage brokers, real estate appraisers, painters, and repairmen are more than happy to hear about a new house sale, and are available to help at a moment’s notice, which is not the case when the housing market is strong. Needless to say, most of my free time lately has been focused on choosing paint colors instead of trying new recipes. However, spring is almost here, and I am looking forward to more cooking and baking in a new kitchen!

If you have been down in the dumps because of the cold winter, cheer up because spring is a mere three weeks away. Late winter is also a wonderful time of year because the maple sugaring season is typically in February and March. Once the temperature reaches above freezing, pressure develops in the tree and causes the sap to flow out of the taps created by the sugar makers. Then with colder temperatures below freezing, suction inside the tree pulls in water to make more sap. When the fluctuations in temperature lessen, the sap stops flowing. This period of sap flow usually falls within early March to mid April. This year the maple sugaring season will be on the later side because the temperatures have been so cold.

According to the University of Vermont Extension Department of Plant and Soil Science, sap is boiled to evaporate water and to concentrate sugar. The quality of syrup is affected by the particular season, time of season the sap is collected, and how it is processed. The top quality syrups contain about 66% sugar.

Since we received a sampler of maple syrups as a gift, Sensitive Husband and I decided to conduct a taste test of all of the grades since we did not know much about the differences among them. The Grade B maple syrup was the darkest in color and had a rich, smoky taste. The Grade A Medium Amber variety was also quite good, and had slightly smoky and slightly buttery flavors. Grade A Dark Amber was also delicious, with buttery and maple flavors. And the Fancy grade was excellent with even stronger butter and maple flavors. Our taste experiment yielded positive results, in that we enjoyed all of the options! I think Grade B would be best for baking, and the Grades A and Fancy would be good for both baking and pouring over breakfast treats. The trick is to make sure that the maple syrup you purchase is pure, with no added sugars or preservatives, to get the best taste.

So now that we finally familiarized ourselves with various grades of maple syrup, the labels of the grades are about to change. The Grade B label will be eliminated, and the grades will explain more about the taste. Maple syrup producers will be required to use them starting in 2015, although consumers will probably start seeing them this year:

Golden Maple Syrup with a Delicate Taste: light to more pronounced golden colour and a delicate or mild taste

Amber Maple Syrup with a Rich Taste: light amber colour and a rich or full-bodied taste

Dark Maple Syrup with Robust Taste: dark color and a robust or strong taste

Very Dark Maple Syrup with a Strong Taste: very strong taste, generally recommended for cooking

According to the International Maple Syrup Institute, 2013 produced a bumper crop of maple syrup in most areas with the production of lighter syrups being most common. Total production of maple syrup for 2013 in Canada and the U.S. combined was estimated at 170 million pounds, with about 120 million pounds being produced in Quebec.

Skillet Chocolate Chip Cookie
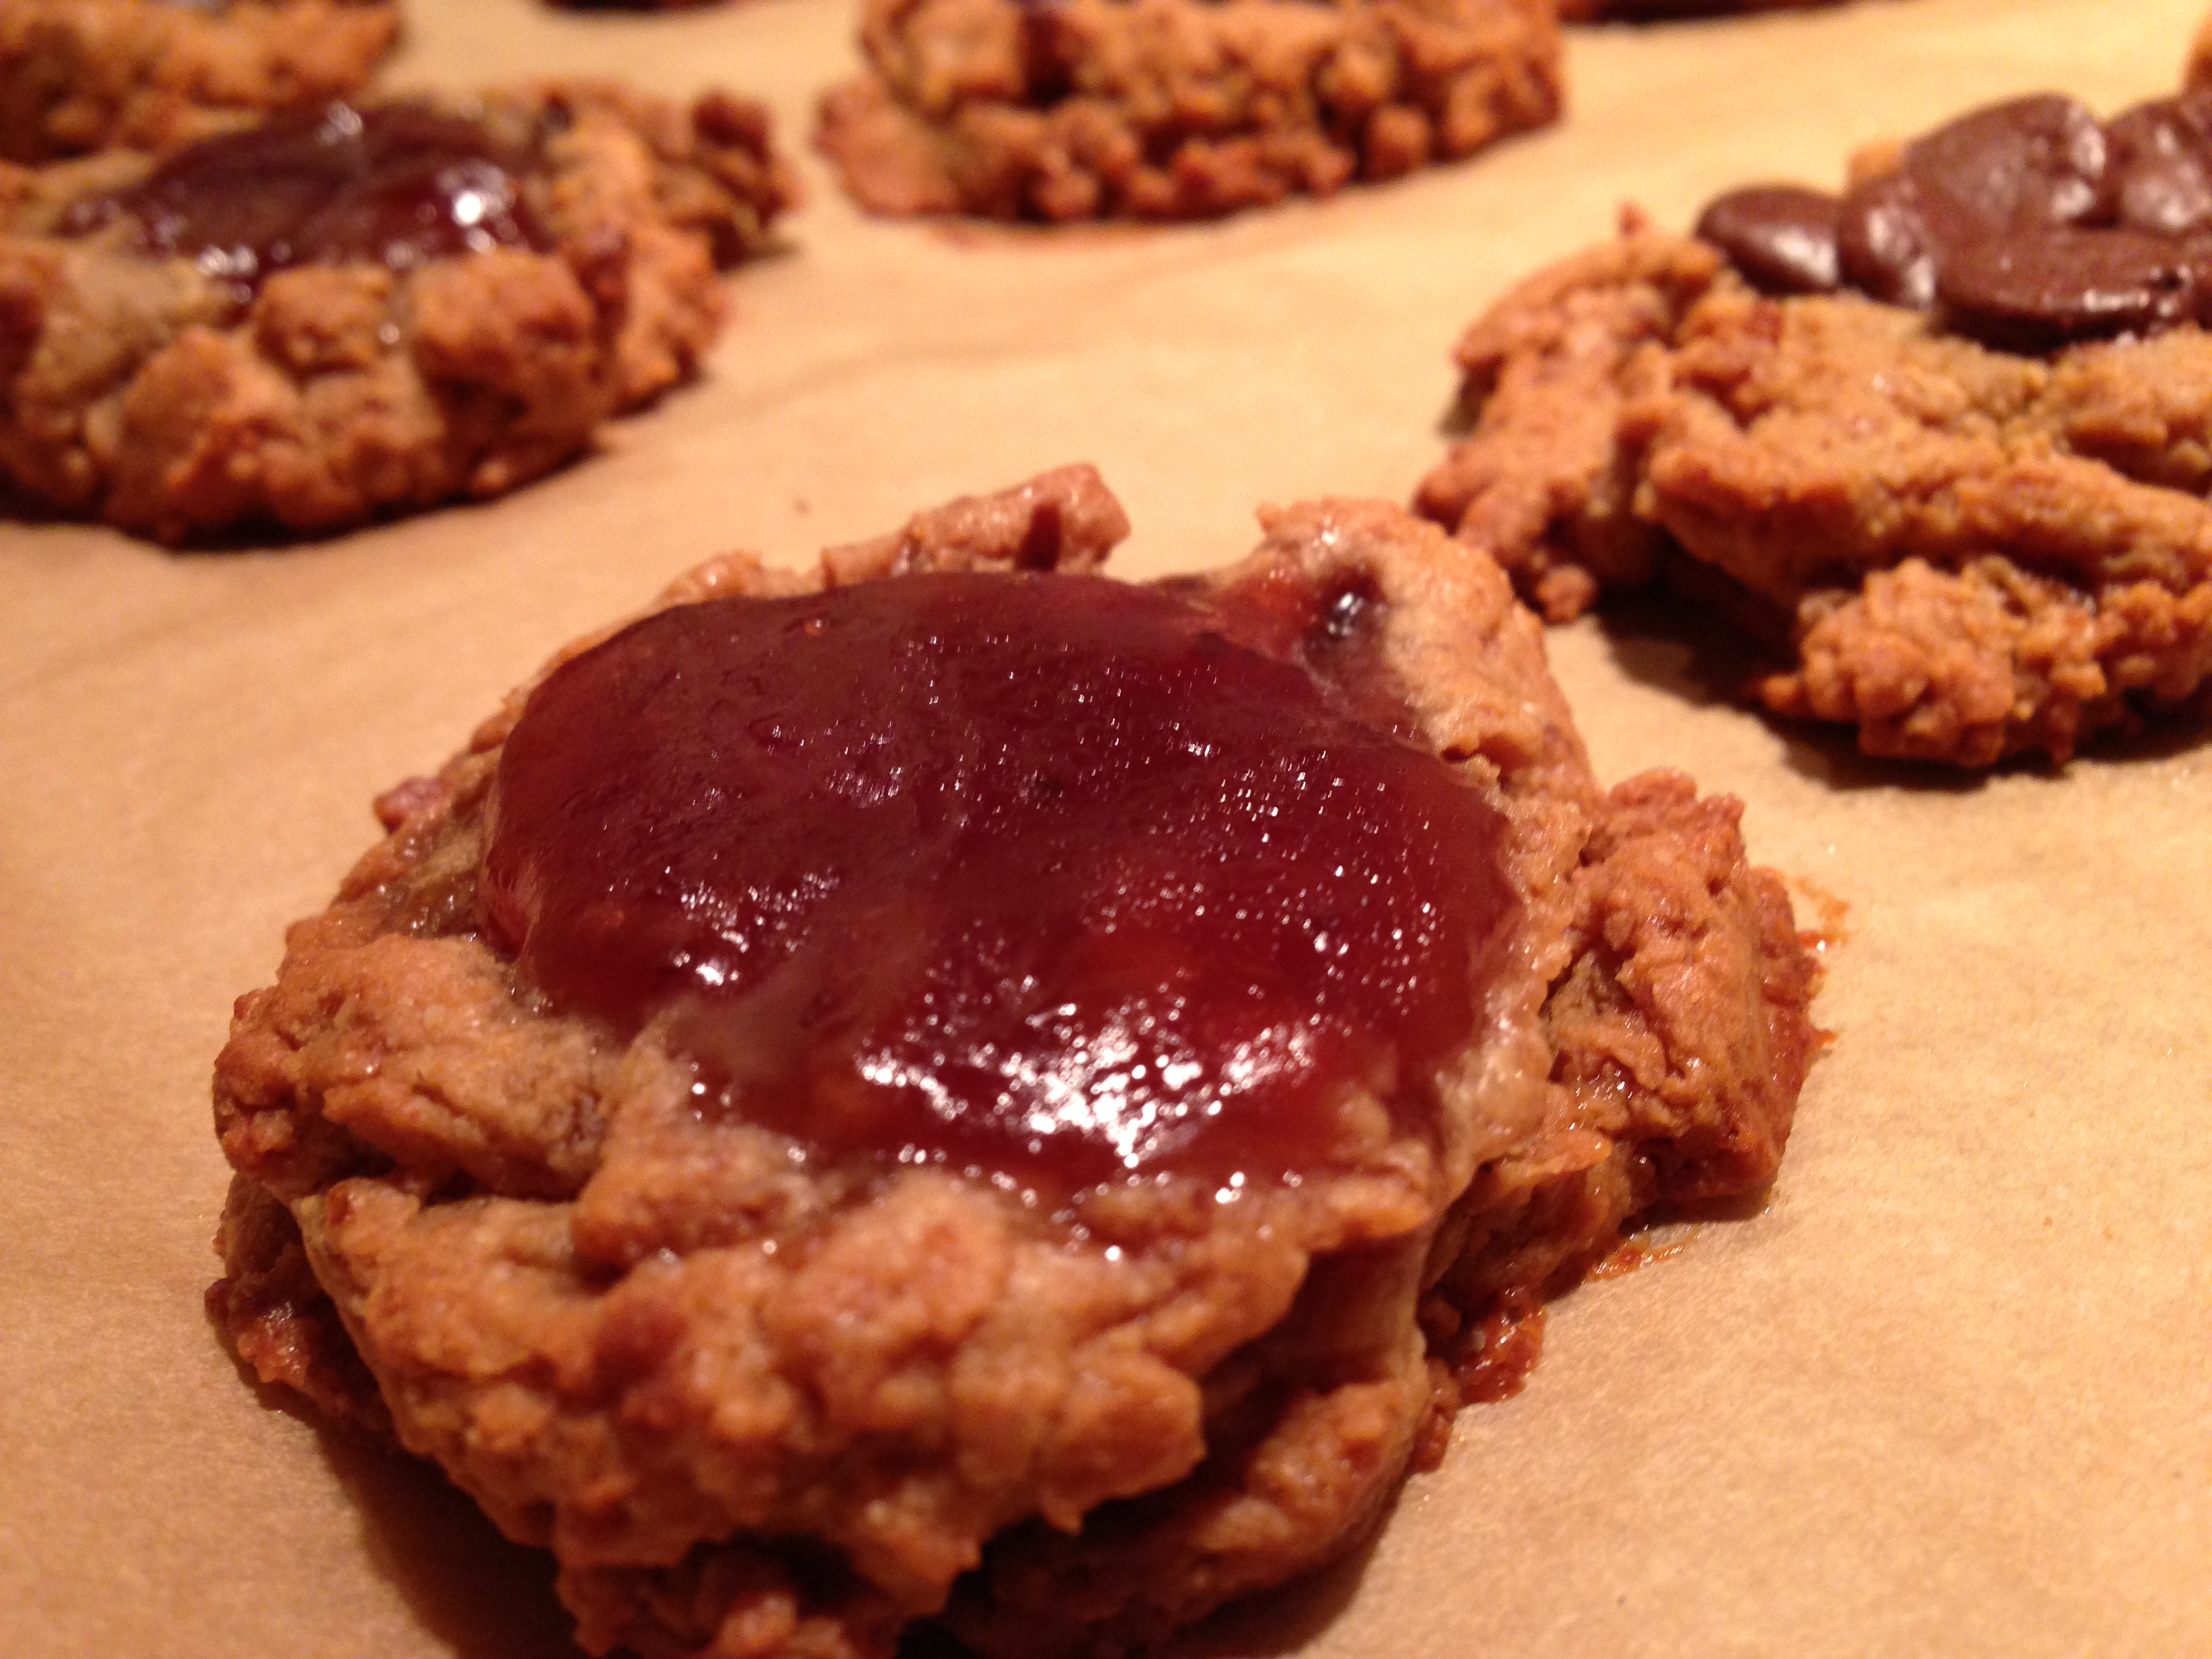
Maple syrup is a fabulous natural sweetener, and can be substituted for cane sugar in most recipes as a 1:1 swap. I substituted maple syrup for the sugar in this recipe for a skillet chocolate chip cookie in the October 2013 Everyday Food magazine. This cookie is delicious and can be made in just a few minutes. I hope that you enjoy finding many ways to use this delicious natural sweetener.

Ingredients:
6 tablespoons unsalted butter, room temperature
1/3 cup maple syrup
1/4 cup coconut palm sugar (or maple sugar)
1 large egg
1 teaspoon pure vanilla extract
3/4 cup all-purpose flour
1/4 cup whole wheat flour
1/2 teaspoon baking soda
1/2 teaspoon coarse salt
3/4 cup grain-sweetened chocolate chips

Preparation:
Preheat oven to 350 degrees. In a large bowl, combine butter, maple syrup, and sugar with a spoon. Stir in egg and vanilla. Stir in flours, baking soda, and salt. Stir in chips. Transfer to a 10-inch cast-iron skillet; smooth top.

Bake until cookie is golden brown and just set in the center, 18 to 20 minutes. Let cool 5 minutes.

Advertisement

Cinnamon Applesauce is Fit for Fine Dining or Casual Dinners

Greetings everyone! I hope that you are enjoying the holiday season. Even though I have not blogged much lately, I have continued to bake and cook – some old favorites as well as some new creations. I hope that you have had a chance to do what you enjoy as well.

The U.S. Census has put together an interesting collection of facts about the holiday season. I was surprised to learn that more than one half of the potatoes produced in the U.S. come from two states – Idaho and Washington. Also, it is estimated that the value of retail sales by electronic shopping and mail-order houses in December 2012 across the nation was more than $39 billion. In terms of mail, almost 15 billion pieces of mail is expected to be delivered between Thanksgiving and New Year’s Eve by the U.S. Postal Service. The busiest mailing day was December 16, and December 18 was the busiest delivery day. I think it’s fascinating to think about all of the ways that holiday preparations affect the economy.

I have been collecting some statistics of my own. Thanks to all of you who gave an opinion in my last poll – how do you like to enjoy apples and pears? Nearly 30% of the respondents enjoy these fruits just the way they are, with no alterations necessary. Approximately 20% of the respondents enjoy the pie variety, and another 20% prefer them in tart form. So I think that many of you will enjoy this very easy recipe for Cinnamon Applesauce, because it tastes very fresh and similar to pie filling.

applesauce1Start with about 12 apples. I like using Macouns because they are crisp and sweet, but you can use your favorite variety for the applesauce. The most time-consuming part of the applesauce process is peeling, coring, and slicing the apples. However, if you have a trusty Apple Corer-Slicer-Peeler, then this step takes about five minutes. If you enjoy making applesauce or any other apple recipe, you will enjoy cooking even more if you have this great gadget.

applesauce2After the apples are peeled, cored, and sliced, place them in a large skillet or saucepan, and cook on medium high heat until the desired consistency, stirring occasionally. Since my apples were sliced rather thinly, and I prefer the end result to be a chunky applesauce, the cooking time was about 20 minutes. However, it can take 30-45 minutes if you have large slices and prefer smooth applesauce.

applesauce3Once you have the desired consistency, stir in 3/4 teaspoon of cinnamon. The approximately two cups of applesauce is now ready to eat, and can be stored in the refrigerator for up to one week.

I find applesauce to be a very comforting and satisfying accompaniment to my dinners, especially meals that involve pork roast. I hope that you enjoy this dish too, fit for either a fancy dinner or a regular one.

Speaking of comforting foods, what is your favorite comfort food? This question is the subject of my latest poll, which can be found on the middle of my blog’s home page. To respond to the poll, simply choose one answer from the list (or write in your own) and click ‘vote.’ You will then see how your answer compares to the ones already recorded. I am interested to see what will be the favorite comfort food!

Spinach Sausage Soup That is Full of Flavor and Free From Gluten, Sugar and Yeast!

SpinachSausageSoupI have been really pleased lately because the weather has been delightful. Not only have I been able to enjoy the outdoors, my CSA farm share extended its season for an additional five weeks! I am still receiving fresh produce that is inspiring me to try new recipes.

Last weekend I had a bounty of farm fresh carrots, garlic, parsley, thyme and spinach. I also had a nice chicken sausage sitting in the fridge that had not yet been spoken for. I decided to whip up a spinach and sausage soup, which seemed like a nice accompaniment to the cool temperatures in the evenings.

If you don’t have fresh herbs on hand, the soup will do well with the dried versions – just use smaller quantities. All of the ingredients can be purchased either at the grocery store or farm stand. My sausage of choice is Aidell’s Roasted Garlic and Gruyere because it does not contain anything that I am sensitive to. Their web site has a useful list of their products with allergen information so you can choose a sausage that will work with your dietary needs. And if you need a yeast/gluten/sugar/onion free broth, Pacific Organic Mushroom Broth is a great option.

The soup is full of flavor and is great as an appetizer or entree. I hope that you find this soup to be delicious too.

Ingredients:
3 cloves garlic, chopped
2 Tbs. olive oil
2-3 carrots, sliced
2-3 celery stalks, sliced
12 oz. smoked sausage (4 links), sliced
2 cups broth (mushroom, vegetable, or chicken)
4 cups water
1 tsp. pepper
2 Tbs. fresh parsley (or 1 Tbs. dried parsley)
1 Tbs. fresh thyme (or 1 tsp. dried thyme)
1-2 cups fresh spinach, washed and ripped/cut into bite-siced pieces

Preparation:
Heat a large saucepan on medium high. Add olive oil and garlic to pan, and allow the garlic to start sizzling. Add the carrots, celery, and sausage to the pan, and allow to brown, stirring occasionally, about 5-10 minutes. Add broth and water to the pan, turn up the heat to high, and bring to a boil. While heating up, add the pepper, parsley and thyme. Once the soup has reached a boil, add the spinach and reduce the heat to a simmer. Allow to simmer for at least 30 minutes; then your soup is ready to enjoy.

I am sharing my recipe with Simply Sugar and Gluten Free.

Fresh Pear and Fig Muffins – and Sugar Free Too

Pear Fig MuffinsHello, everyone! I hope that you are enjoying a beautiful day. The weather forecast predicted clouds and rain yet we have sun and a warm temperature. I am keeping myself busy with a bit of baking rather than thinking of decreasing my estimates for GDP growth due to the federal government shutdown.

Early fall is a good time to use fresh pears and the last of the season of fresh figs. If you can’t find fresh figs in the grocery store, a dried version will also be good in this recipe. If you prefer an alternate dried fruit, apricots or raisins would work well too. My inspiration was Five and Spice’s version of Pear and Fig Morning Muffins since the pictures looked delicious. I substituted the all purpose flour with a combination of whole wheat and oat, swapped the butter with canola oil, added some cinnamon, and used plain yogurt instead of buttermilk. Yes, these ingredients worked out very well together. Hopefully our federal legislators will work together soon too.

If you have not yet answered my current survey, please do since economists really thrive on analyzing survey results. Just visit my homepage and in two clicks you can provide an opinion to your favorite way of enjoying apples and pears, along with seeing the current tally of results. Thanks!

Ingredients:
4 Tbs. canola oil
1/3 cup figs, finely chopped (either fresh or dried)
1 small-medium pear, ripe but still firm, finely chopped
1 cup whole wheat flour
3/4 cup oat flour
1 tsp. baking powder
1/2 tsp. baking soda
1/2 tsp. salt
1/2 tsp. ground cardamom
1/2 tsp. ground cinnamon
3 Tbs. honey
1 large egg, at room temperature
1 egg yolk, at room temperature
1 cup plus 2 Tbs. yogurt

Preparation:
Preheat your oven to 400F.

In a small-medium bowl, combine the flours, baking powder, baking soda, salt, cardamom, and cinnamon. Set aside.

In a medium-large mixing bowl whisk together the honey, egg, and egg yolk for a couple of minutes, until the color lightens. Then whisk in the canola oil until well combined. Finally whisk in the yogurt.

Pour in the dry ingredients and stir together with a wooden spoon. Add the chopped fruits on top of the batter. Stir just enough to mix it in, then stop.

Use 2 spoons to drop heaping spoonfuls of batter into the lined muffin tins.

Bake for about 20 minutes, until golden on top and a toothpick inserted into a muffin comes out clean. Makes 12 muffins.

Fall Equinox Favorites: (Gluten/Sugar/Nut Free) Pesto and Watermelon Granita

rosesHappy Fall Equinox, everyone! Our weather is absolutely spectacular and we are enjoying a bounty of fresh fruits and vegetables. SensitiveHusband and I are stretching out the summer feeling by being outside and making some fresh foods that freeze well. These roses are from my garden – they smell like honey and look pretty and delicate.

pestoOne of the summer foods that we have been consistently eating is pesto. We like fresh pesto as a replacement for mayonnaise or mustard on a sandwich, and it’s also great on a cracker or carrot stick. Pesto is really quick to make although the first time I felt like making it I did not have any pine nuts, a common ingredient, on hand. So I found inspiration from the Farmers’ Almanac – and used chickpeas instead! Here is my interpretation of a summer favorite that can easily be frozen and savored throughout the cooler months.

Nut-Free Pesto (or Pistou) Ingredients:
1 cup fresh basil, washed
1/4 cup chickpeas, rinsed
1/3 cup grated cheese (I like Parmesan and Pecorino Romano)
1 clove garlic, peeled
1/4 cup olive oil
1/4 cup canola oil
pinch of kosher salt
juice from 1/4 lemon

To prepare, place all of the ingredients in a food processor and pulse until desired consistency. Store in the refrigerator for up to one week or freeze for later use.

granitaAnother way to prolong the summer foods is by making a granita, which is similar to a frozen ice. The results for this next recipe is from you and everyone who shared an opinion to the poll question: What is your favorite summertime food? The results were close, although watermelon won out with 27% of the votes. I found a recipe for a watermelon granita from Ellie Krieger, and instead of using cane sugar I used agave nectar. This is a nice way to sweeten watermelon that is not quite as flavorful as it was during the height of the summer, and you can keep it frozen for awhile and enjoy as the temperatures turn cooler. The first time I made the granita, I thought the flavor of the mint was overwhelming so the recipe below tones down the amount used.

Watermelon Granita Ingredients:
4 cups seeded, cubed watermelon
1/3 cup fresh lime juice
1/8-1/4 cup mint, finely chopped, plus more for garnish
1/3 cup agave nectar

To prepare, puree watermelon in a food processor. Strain puree through a sieve and strain out solids, forcing liquid out with a wooden spoon. Discard solids. Combine the watermelon puree, lime juice, mint and agave nectar in a 9 by 13-inch metal pan. Place mixture in the freezer, scraping thoroughly with a fork every 30 minutes for about 2 1/2 hours, or until the granita resembles coarse crystals. Scrape 1 last time and spoon into parfait glasses or bowls. Top with a mint sprig.

Since it is the Fall Equinox and the season for apples and pears, it is time for a new poll! What is your favorite way to enjoy apples and pears? Do you like to eat them straight from the tree, or do you prefer to indulge in a pie or other dessert? Please vote for your favorite treat by clicking on my home page, choosing your answer, and clicking ‘vote.’

Sugar and Gluten Free PB&J Cookies

PB&J CookiesHappy Labor Day weekend everyone! The U.S. Census has posted a range of statistics to celebrate the holiday. For instance, in 2012 the largest occupation was retail salesperson; while in 1910 the largest occupation was farmer. The first observance of Labor Day was in 1882 when about 10,000 workers gathered in New York City for a parade. That celebration inspired similar events across the U.S., and by 1894 more than half the states were observing a “workingmen’s holiday” on one day or another. Later that year, President Grover Cleveland signed the bill making the first Monday in September “Labor Day.”

I hope that you are enjoying the long weekend. It’s always nice to have an extra day to relax and to enjoy a range of activities, which for me includes baking. For some of you it may mean back to school, which in my case includes memories of peanut butter and jelly sandwiches. Perhaps my thoughts around this time of year inspired me to try a version of Jack Deen’s Peanut Butter & Jelly Thumbprint Cookies that I noticed in the September 2, 2013 edition of People Magazine.

I removed the two types of sugar and substituted with coconut palm sugar and honey. I used my cane sugar free brand of strawberry jam, and also tried some with chocolate chips, as the middle garnish. I hope you like this sugar free version of a very tasty cookie.

Ingredients:
1 cup peanut butter
1/3 cup coconut palm sugar
3 tbs honey
1 large egg
1tsp vanilla extract
strawberry jam* (or chocolate chips^)

*St. Dalfour is a great brand of jam without cane sugar
^Endangered Species makes chocolate bars that are gluten and refined sugar free that you can cut into chunks

Preparation:
1. Preheat oven to 350 degrees.
2. Beat peanut butter, sugar, honey, egg, and vanilla extract at medium speed with an electric mixer until blended. Spoon heaping tablespoonfuls of batter on a parchment paper-ined baking sheet. Flatten dough with a fork. Make a 1/2 inch indentation in the center of each cookie using your thumb. Spoon 1/2 tsp jam (or chocolate chips) into each thumbprint.
3. Bake 12 to 14 minutes or until golden. Makes 12 cookies.

Sugar Free! Key Lime and Chocolate Cream Pies

Two PiesOnce you have the sugar free graham cracker crusts prepared (see my previous blog post for the recipe), you can fill them any way you choose. I tried making key lime and chocolate cream pies because they are such sweet treats for the summertime, and I wanted to take on the challenge of making them sugar free.

For the key lime pie, I started with a Cooking Light magazine recipe that is a healthier version than many other recipes I reviewed. The trick with a key lime pie is to get the right consistency without using sweetened condensed milk. My online research found that heating evaporated milk with agave nectar could work as a good substitute. Adding Greek yogurt to the filling provides some tang and a thick consistency. This pie takes a while to bake and it will continue to thicken once it is out of the oven and cools. Fresh key lime juice tastes great in this pie although fresh lime juice will work just as well.

Ingredients for Filling:
1/2 cup plain 2% reduced-fat Greek yogurt
1/2 cup fresh Key lime juice (or fresh lime juice)
1/2 teaspoon lime zest
3 large egg yolks
1 (14-ounce) can evaporated milk
1 cup agave nectar

Preparation:
1. Preheat oven to 350°.
2. Combine evaporated milk and agave nectar in a small saucepan. Cook on low heat for approximately 10 minutes. Use approximately 14 ounces (or 1 2/3 cups) of the resulting mixture in the filling in the next step.
3. To prepare filling, place yogurt, lime juice, lime zest, egg yolks, and milk/agave mixture in a bowl; beat with a mixer at medium speed for 2 minutes. Pour mixture into prepared crust. Bake at 350° until set, about 35 minutes. Cool pie completely on a wire rack. Cover loosely, and chill at least 2 hours. Serve with whipped cream.

As for the chocolate cream pie, I again started with a Cooking Light recipe as the base. I substituted the coconut palm sugar for the cane sugar, and used grain sweetened chocolate (Endangered Species or Sunspire are delicious cane sugar free options) instead of the usual store-bought sugary brands. This pie is delicious and had a light and rich texture.

Ingredients for Filling:
2 cups fat-free milk, divided
1/2 cup coconut palm sugar
1/3 cup unsweetened cocoa
3 tablespoons cornstarch
1/8 teaspoon salt
1 large egg
2 ounces (cane sugar free) chocolate, chopped
1 teaspoon vanilla extract
1 teaspoon grated (cane sugar free) chocolate

Preparation:
1. To prepare filling, combine 1/2 cup milk, 2/3 cup palm sugar, and next 4 ingredients (2/3 cup palm sugar through egg) in a large bowl, stirring with a whisk.
2. Heat 1 1/2 cups milk in a heavy saucepan over medium-high heat to 180° or until tiny bubbles form around edge (do not boil). Remove from heat. 3. Gradually add hot milk to sugar mixture, stirring constantly with a whisk. Return milk mixture to pan. Add chopped chocolate; cook over medium heat until thick and bubbly (about 5 minutes), stirring constantly. Reduce heat to low; cook 2 minutes, stirring constantly.
4. Remove from heat; stir in vanilla. Pour into prepared crust; cover surface of filling with plastic wrap. Chill 3 hours or until cold. Remove plastic wrap; spread whipped cream evenly over filling. Sprinkle with grated chocolate.

Pi PlateServe your favorite pie in a pie plate – or in my case – a pi plate! Pi (pronounced “pie”) is the ratio of the circumference of a circle to the diameter, which is the same value no matter the size of the circle.

Step 1 for Sugar Free Pies – Graham Cracker Crust

Two PiesGood day! I hope that this blog post finds you doing well. I have been trying some new recipes over the past few weeks and trying to keep up with all of the CSA produce that I receive each week. The weather this summer seems to be conducive to leafy green vegetables, which always make my day. Now that the temperature is heating up, corn, tomatoes, and beans are plentiful.

I have also been working on a baking project – how to make pies without refined sugars. The fillings can be challenging because it can be tricky to get the correct consistency. And I have not been able to use any graham cracker crust recipes because virtually all call for crumbled store-bought graham crackers – and I have not been able to find a brand without sugar. So I had to take a more proactive approach in order to bake a sugar-free crust.

SensitiveHusband recently purchased a lovely cookbook for me called Make the Bread, Buy the Butter by Jennifer Reese. The author has made dozens of popular foods and calculated how much it costs to create them homemade, and then compared the cost of similar store-bought items. Based on the difficulty of the homemade preparation and the cost, the author then recommends either making the item or buying it. Fortunately she includes a recipe for honey graham crackers. According to her calculations, homemade graham crackers cost approximately $0.18 per ounce, Honey Maid Cinnamon Grahams are $0.23 per ounce, and Annie’s organic graham crackers are $0.53 per ounce.

I adapted the recipe to remove the refined sugars by replacing with coconut palm sugar, and figured out how to roll into two crusts rather than shape into crackers (although you could still use this recipe for crackers). This recipe yields the lightest and tastiest graham cracker crust – the best I have ever sampled. SensitiveHusband agreed that this crust is terrific.

Step 1 for baking pies is having a great crust, and the recipe delivers. This is definitely more labor-intensive than purchasing a box of graham crackers, but the taste of the homemade version is worth it.

Ingredients:
1 1/2 cups all-purpose flour
3/4 cup whole-wheat flour
1/4 cup wheat germ
1 1/2 teaspoons kosher salt
1/2 teaspoon baking soda
1/2 teaspoon cinnamon
2 sticks unsalted butter, softened
1/3 cup coconut palm sugar
1/4 cup honey

Preparation:
1. Stir together the flours, wheat germ, salt, baking soda, and cinnamon in a medium bowl.
2. In another bowl, beat the butter, sugar, and honey until fluffy. Add the dry ingredients and stir well. Turn the dough onto a floured surface, knead once or twice, then flatten into a disk. Wrap and refrigerate for at least 30 minutes and up to overnight.
3. Cut the dough into two portions. On a floured surface, roll one portion of the dough into a circle that is about 1/8 inch thick. Transfer to a pie plate and remove any dough that hangs over the sides. Prick the dough with a fork in a number of places throughout the dough. Repeat this process with the other portion of remaining dough.
4. Bake the two crusts in an oven that has been preheated to 350 degrees F for about 12 minutes or until very lightly browned. Make sure the crusts are completely cooled before moving onto creating your pie fillings.

Spiced (and Sugar Free) Banana Nut Muffins

SpicedBananaNutGood day, everyone! I hope you are having a nice week. I have been busy at work, including enjoying a fun project – estimating the economic impact due to the arrival of the royal baby. Analysts expect that this economic impact in the U.K. will be higher than those measured due to the royal wedding or the Queen’s diamond jubilee events because there are no public holidays scheduled, which closed financial markets and establishments, and reduced retail spending. It is estimated that the U.K. should see about a $400 million bump to the economy this summer. The largest boosts will be in industries related to food and drink as well as memorabilia. I know I did my part to stimulate the U.S. economy by buying refreshments for a Royal Baby (Sugar Free) Cupcake Party at my office this week!

In case you are inclined to host your own Royal Baby Tea in the near future – Newman’s Own sells a delicious Royal Tea in a variety of flavors. Scones are delicious and a good idea to include at a Tea – I have recipes online for Millet Raisin, Pear and Oat, and Banana Berry. Muffins can also be a nice addition to a party, and below is a recipe for Spiced Banana Walnut Muffins that I adapted from a July 2009 issue of Oprah Magazine. I substituted the sugar with maple syrup, added brown rice flour in order to reduce the gluten content, and removed the butter by adding canola oil. The result is a light and moist muffin with a unique combination of flavors. For additional spice, add another 1/2 teaspoon of cardamom.

Ingredients
1 cup whole wheat flour
1/2 cup brown rice flour
1/2 cup all-purpose flour
1 tsp. baking soda
1/2 tsp. ground cardamom
1 1/2 tsp. ground cinnamon
1 tsp. ground nutmeg
1/2 tsp. salt
3/4 cup maple syrup
1/2 cup canola oil
3 very ripe mashed bananas
1/2 cup unsweetened applesauce
1 tsp. orange zest
1 tsp. vanilla extract
2 eggs
1/2 cup coarsely chopped walnuts

Preparation
Preheat oven to 350°. Line muffin tins with paper liners or grease well; set aside.

Put flours, baking soda, cardamom, cinnamon, nutmeg, and salt into a large bowl; set aside. Put maple syrup and oil into a second large bowl and mix until well combined. Add bananas, applesauce, zest, vanilla, and eggs to the syrup-oil mixture, and mix again until combined. Add flour mixture to banana mixture in three parts, stirring well after each addition; fold in walnuts.

Spoon batter into prepared tins; bake until a toothpick inserted in the center of a muffin comes out clean, about 25 minutes. Serve warm or at room temperature.

An Abundance of Vegetables and an Afternoon Makes a Rustic Tart

spinach-bokchoy-collardsHappy Summer everyone! The days are long and the temperatures are heating up. Speaking of summer, have you participated in my latest two-click poll? I am interested in your opinions regarding your favorite summertime foods. I plan to create a new recipe based on the food that receives the most votes, so thank you for your participation! Just click this link or visit my home page.

My CSA farm share continues to surprise me. Last week my box was filled with an assortment of green leafy vegetables including bok choy (pictured in the front), collard greens (on the right), and spinach (on the left). The bok choy, also referred to as Chinese Cabbage, has thick, white, edible stems. Collard greens, like bok choy, are part of the cabbage family, with wide, green stems that resemble pretty fans. Native to central and southwestern Asia, spinach is an edible flowering plant in the amaranth family with leaves that are smaller than the others already mentioned. They are all delicious but I prefer to eat them cooked because they have a sweeter flavor and are easier to chew and digest. Since I had an abundance of leafy greens, I decided to try a vegetable tart. I was inspired by Leah Eskin’s recipe for Chard Tart that I found in a newspaper. I had never made a tart before, and I must warn you, the recipe is a bit more involved then one of my typical recipes. There are a number of steps and the total process takes awhile because you have to allow for chilling time (for your crust, as well as yourself).

veggietartThe recipe calls for rolling out the pastry dough, which I would rephrase to “pound with fists until the dough kind of resembles a lopsided circle.” However, the shape of your dough only lends itself to the rustic nature of this tart. The flavor is delicious, and the crust was quite crispy. I liked the comfortable look of the tart, which can be eaten as a vegetable alongside a main entree, or as the main highlight of a meal.

veggietartsliceThe tart can be easily frozen, although SensitiveHusband and I had no trouble polishing this off within a few days. If you find yourself with an afternoon without a set schedule and an abundance of green vegetables, give this recipe a try.

Rustic Green Vegetable Tart

Ingredients:
–2 bunches (about 1 ½ pounds) leafy green vegetables (such as swiss chard, spinach, kale, collard greens or bok choy)
–2 tablespoons olive oil
–kosher salt and freshly ground black pepper
–1 clove garlic, finely chopped
–1 egg yolk
–2 tablespoons freshly grated Parmesan
–2 teaspoons fresh herbs (such as parsley, basil or thyme)
–Pastry (recipe below)

Shred: Fold each washed leafy vegetable in half along its center rib. Trim away ribs. Roll up leaves and slice thinly crosswise.

Wilt: Heat olive oil in a wide skillet over medium heat. Add garlic, salt and pepper and cook, stirring, until lightly colored, about 2 minutes. Toss in green vegetables. Cook, stirring, until wilted and liquid has evaporated, about 5 minutes. Take off the heat and allow to cool slightly, about 5 minutes. Stir in egg, cheese and herbs.

Roll: On a lightly floured work surface, roll out pastry to a 12-inch circle. Roll around the pin and unroll onto a parchment-paper-lined baking sheet. (Alternatively, pound pastry with fists on a lightly floured work surface until pastry resembles an oddly-shaped circle. Transfer very carefully onto a parchment-paper-lined baking sheet.)

Fill:
Spread vegetables onto pastry in an 8-inch circle. Fold edges of pastry up and over, forming a casual tart.

Bake: Slide pan into a 400-degree oven, and bake until pastry turns golden, about 35 minutes. Serves 8.

Pastry: Mix well: 1 cup flour, 1/4 cup almond flour, 1 teaspoon maple syrup, 1/4 teaspoon fine salt and a few grinds of pepper. Drop in 9 tablespoons cold unsalted butter, cut into slices. Cut butter into flour mixture with two forks until lumps range in size from cornflakes to crumbs. Drizzle in up to 5 tablespoons cold water, folding with a flexible spatula or fork, until pastry comes together. Pat into a thick disk or ball. Wrap in waxed paper and chill at least 1 hour.

I am sharing my recipe with Simply Sugar and Gluten Free.