Category Archives: Recipes – Entrees

Sausage and Spinach Frittata

New Year's Day BrunchHello, everyone! I hope that you are doing well. I have been busy moving so I have not had as much time as usual for cooking and writing. However, now we are settling into our new place and I am really enjoying our new kitchen! I think it will be a lot of fun to develop new foods over time.

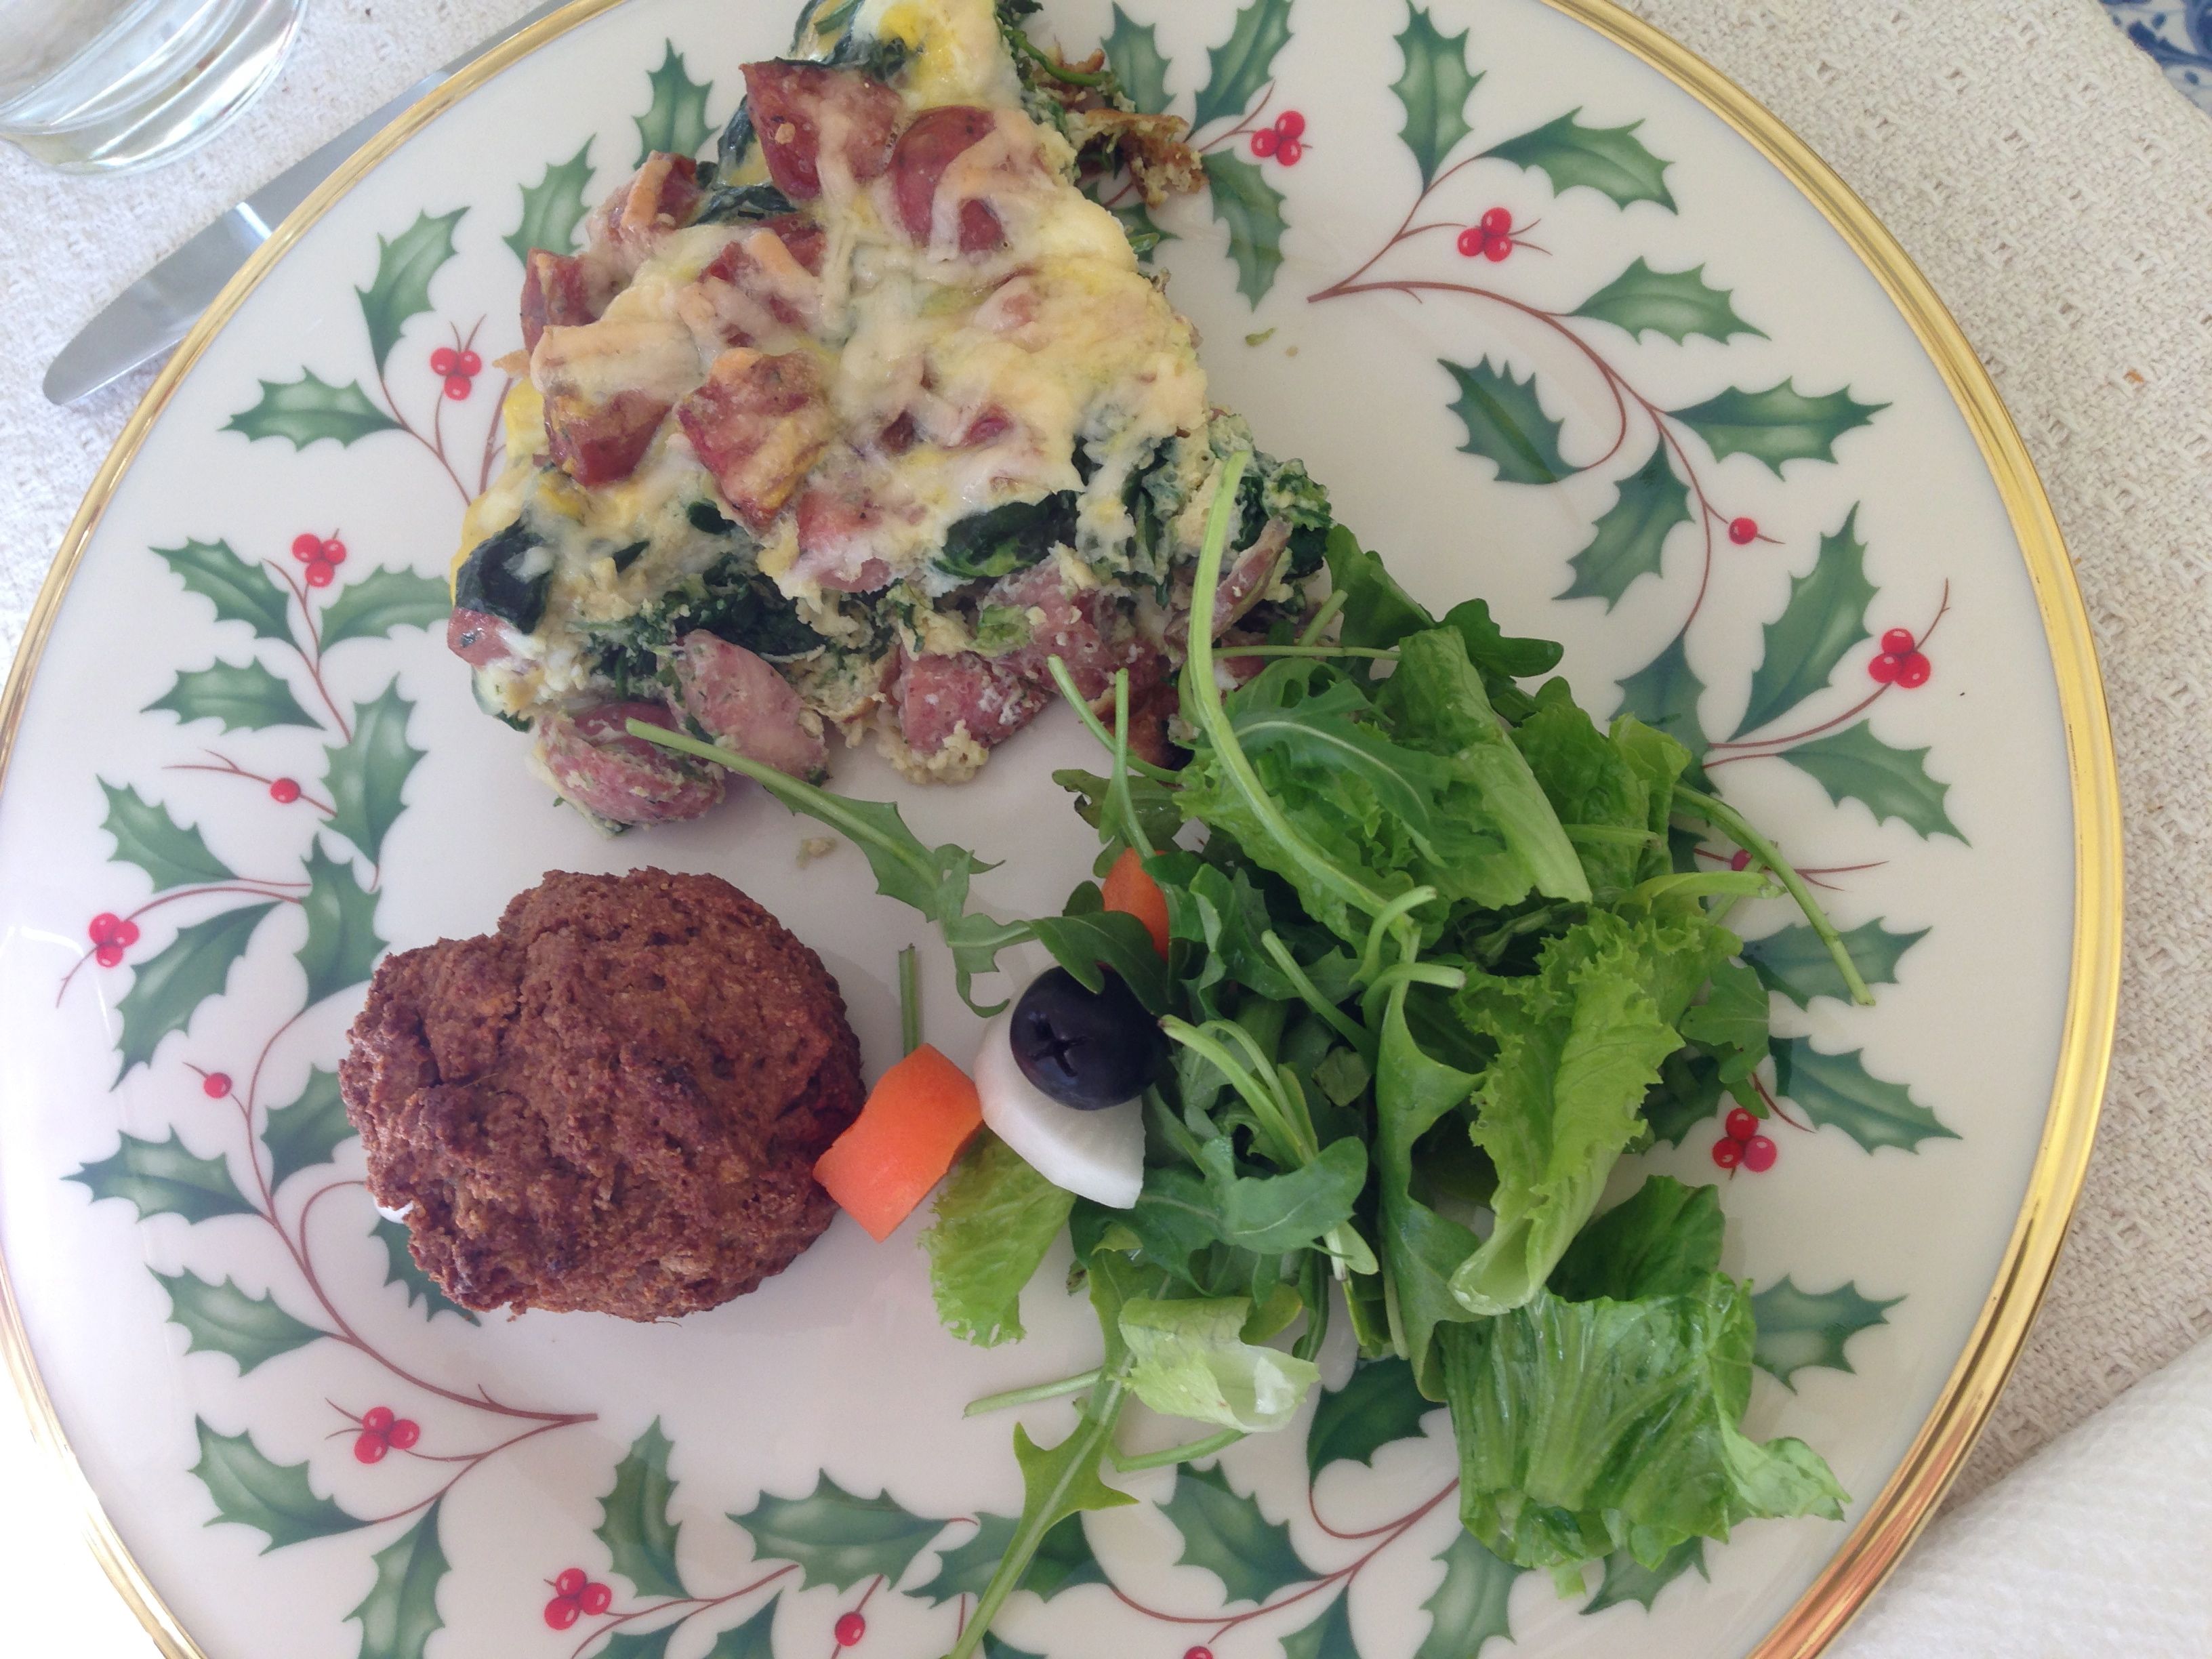
A few months ago I prepared a brunch for SensitiveHusband and me. The brunch took place awhile ago, as you can probably tell from the winter-themed plates we used! However, the menu will work well during any season. In fact, this meal has become a ‘regular’ in our house because we always have these ingredients on hand and the meal can be made within 30 minutes. The main star is a Spinach and Sausage Frittata, which has the texture of a fluffy omelette.

New Year's Day Brunch 2I was inspired by a frittata recipe that I found online through MyRecipes. I decided to use fresh spinach rather than frozen, I reduced the amount of cheese and egg just a bit, and I found a wonderful sausage that is free of sugar, yeast, and onions while still full of flavor. Did I mention that the sausages are gluten free too? And they are fully cooked? Can you tell I like them?

I served the frittata with some pumpkin muffins, a simple salad, and a bunch of grapes. We really enjoyed this meal! I hope you do too.

Ingredients
2 tablespoons olive oil
2-3 medium sweet sausages (about 10 oz.) (A great brand is Aidell’s – my favorite is Roasted Garlic & Gruyere Cheese)
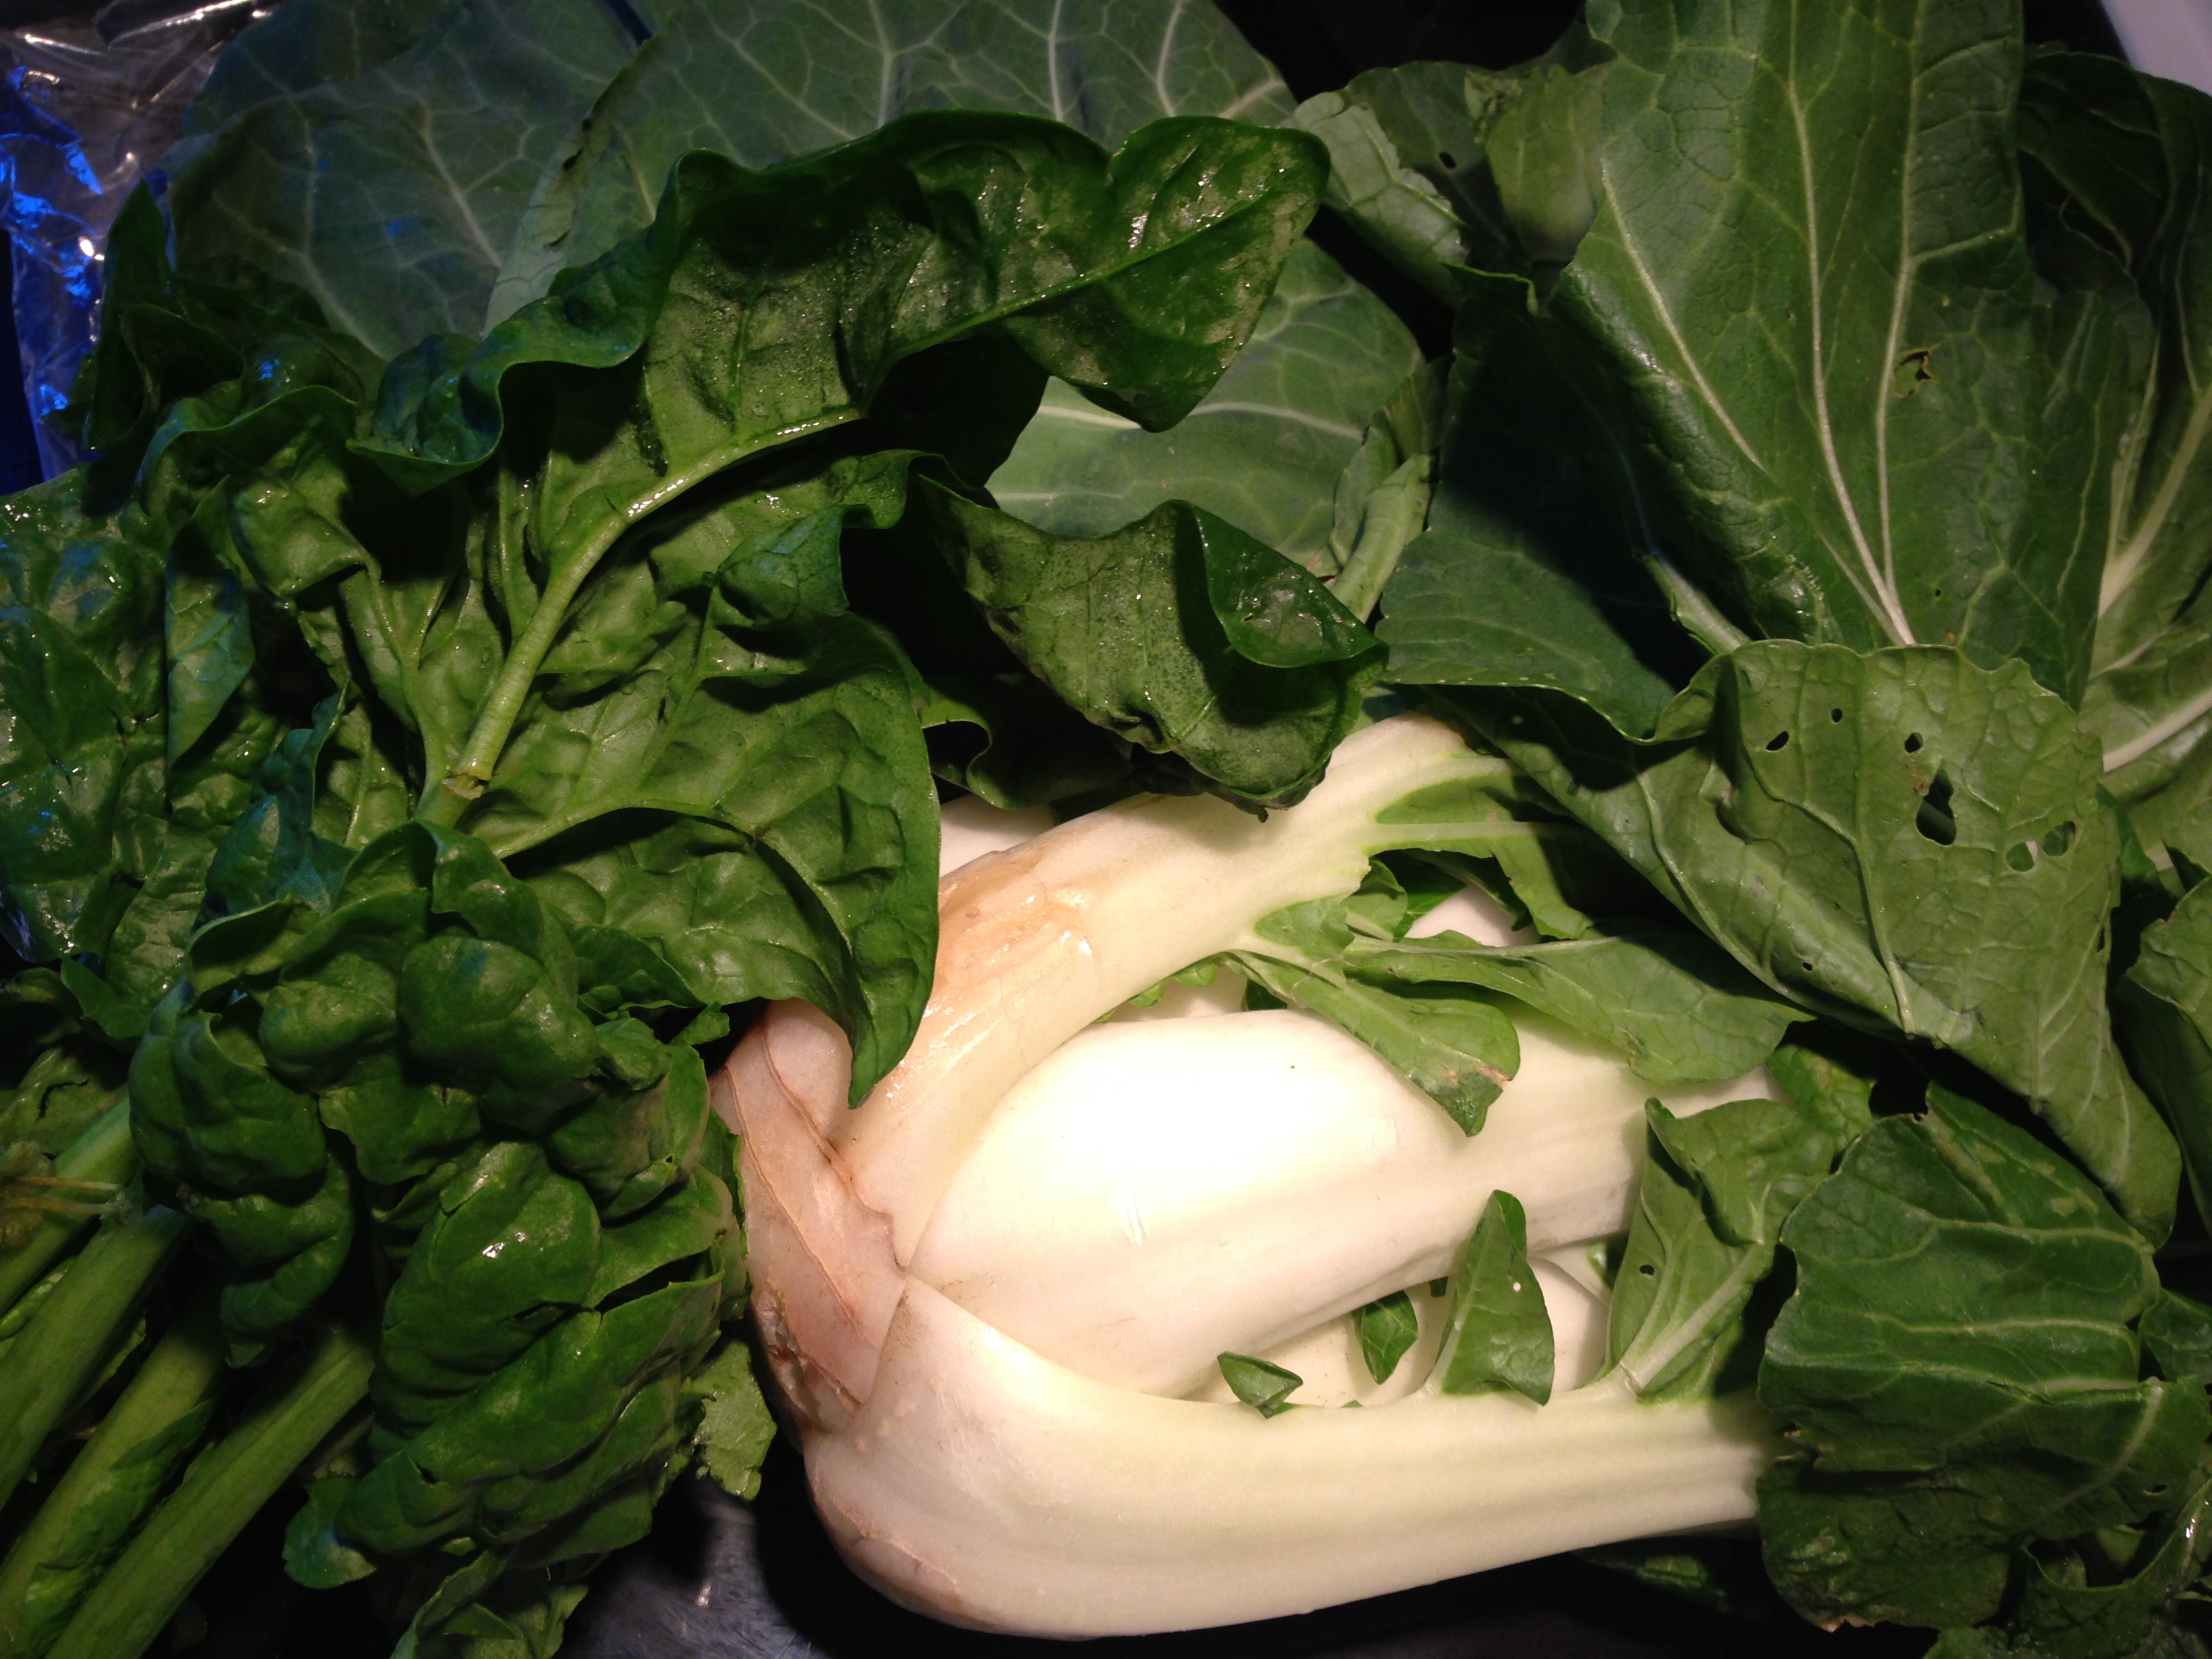
1 (10 oz.) package fresh spinach, rinsed (frozen spinach can also be used)
8 eggs, lightly beaten
1/3 cup shredded cheese (I like Asiago, Parmesan would also work well)

Preparation
Preheat oven to 400°F. In a large nonstick, ovenproof skillet, warm olive oil over medium-high heat. (If skillet isn’t ovenproof, wrap handles in a double layer of foil.) Chop sausage into bite-sized pieces and add to skillet. Brown the sausages on all sides, about 7-10 minutes (or if using uncooked sausages, cook thoroughly).

Squeeze as much liquid as possible from spinach, then add to skillet. Cook, stirring well and scraping up any cooked bits on bottom of skillet.

Pour eggs into skillet and stir to mix with spinach/sausage mixture. Stop stirring and cook over medium heat, lifting edges of frittata with a spatula to let uncooked eggs flow underneath. Cook until almost set, about 3 minutes.

Sprinkle cheese on top and transfer skillet to oven. Bake, uncovered, until frittata is puffed and lightly browned on top, about 10-12 minutes. Lift frittata around edges of skillet and gently shake pan to loosen. Slide out of pan and onto a cutting board and cut into wedges. Serve hot or at room temperature. Makes 4-6 servings.

Advertisement

Spinach Sausage Soup That is Full of Flavor and Free From Gluten, Sugar and Yeast!

SpinachSausageSoupI have been really pleased lately because the weather has been delightful. Not only have I been able to enjoy the outdoors, my CSA farm share extended its season for an additional five weeks! I am still receiving fresh produce that is inspiring me to try new recipes.

Last weekend I had a bounty of farm fresh carrots, garlic, parsley, thyme and spinach. I also had a nice chicken sausage sitting in the fridge that had not yet been spoken for. I decided to whip up a spinach and sausage soup, which seemed like a nice accompaniment to the cool temperatures in the evenings.

If you don’t have fresh herbs on hand, the soup will do well with the dried versions – just use smaller quantities. All of the ingredients can be purchased either at the grocery store or farm stand. My sausage of choice is Aidell’s Roasted Garlic and Gruyere because it does not contain anything that I am sensitive to. Their web site has a useful list of their products with allergen information so you can choose a sausage that will work with your dietary needs. And if you need a yeast/gluten/sugar/onion free broth, Pacific Organic Mushroom Broth is a great option.

The soup is full of flavor and is great as an appetizer or entree. I hope that you find this soup to be delicious too.

Ingredients:
3 cloves garlic, chopped
2 Tbs. olive oil
2-3 carrots, sliced
2-3 celery stalks, sliced
12 oz. smoked sausage (4 links), sliced
2 cups broth (mushroom, vegetable, or chicken)
4 cups water
1 tsp. pepper
2 Tbs. fresh parsley (or 1 Tbs. dried parsley)
1 Tbs. fresh thyme (or 1 tsp. dried thyme)
1-2 cups fresh spinach, washed and ripped/cut into bite-siced pieces

Preparation:
Heat a large saucepan on medium high. Add olive oil and garlic to pan, and allow the garlic to start sizzling. Add the carrots, celery, and sausage to the pan, and allow to brown, stirring occasionally, about 5-10 minutes. Add broth and water to the pan, turn up the heat to high, and bring to a boil. While heating up, add the pepper, parsley and thyme. Once the soup has reached a boil, add the spinach and reduce the heat to a simmer. Allow to simmer for at least 30 minutes; then your soup is ready to enjoy.

I am sharing my recipe with Simply Sugar and Gluten Free.

An Abundance of Vegetables and an Afternoon Makes a Rustic Tart

spinach-bokchoy-collardsHappy Summer everyone! The days are long and the temperatures are heating up. Speaking of summer, have you participated in my latest two-click poll? I am interested in your opinions regarding your favorite summertime foods. I plan to create a new recipe based on the food that receives the most votes, so thank you for your participation! Just click this link or visit my home page.

My CSA farm share continues to surprise me. Last week my box was filled with an assortment of green leafy vegetables including bok choy (pictured in the front), collard greens (on the right), and spinach (on the left). The bok choy, also referred to as Chinese Cabbage, has thick, white, edible stems. Collard greens, like bok choy, are part of the cabbage family, with wide, green stems that resemble pretty fans. Native to central and southwestern Asia, spinach is an edible flowering plant in the amaranth family with leaves that are smaller than the others already mentioned. They are all delicious but I prefer to eat them cooked because they have a sweeter flavor and are easier to chew and digest. Since I had an abundance of leafy greens, I decided to try a vegetable tart. I was inspired by Leah Eskin’s recipe for Chard Tart that I found in a newspaper. I had never made a tart before, and I must warn you, the recipe is a bit more involved then one of my typical recipes. There are a number of steps and the total process takes awhile because you have to allow for chilling time (for your crust, as well as yourself).

veggietartThe recipe calls for rolling out the pastry dough, which I would rephrase to “pound with fists until the dough kind of resembles a lopsided circle.” However, the shape of your dough only lends itself to the rustic nature of this tart. The flavor is delicious, and the crust was quite crispy. I liked the comfortable look of the tart, which can be eaten as a vegetable alongside a main entree, or as the main highlight of a meal.

veggietartsliceThe tart can be easily frozen, although SensitiveHusband and I had no trouble polishing this off within a few days. If you find yourself with an afternoon without a set schedule and an abundance of green vegetables, give this recipe a try.

Rustic Green Vegetable Tart

Ingredients:
–2 bunches (about 1 ½ pounds) leafy green vegetables (such as swiss chard, spinach, kale, collard greens or bok choy)
–2 tablespoons olive oil
–kosher salt and freshly ground black pepper
–1 clove garlic, finely chopped
–1 egg yolk
–2 tablespoons freshly grated Parmesan
–2 teaspoons fresh herbs (such as parsley, basil or thyme)
–Pastry (recipe below)

Shred: Fold each washed leafy vegetable in half along its center rib. Trim away ribs. Roll up leaves and slice thinly crosswise.

Wilt: Heat olive oil in a wide skillet over medium heat. Add garlic, salt and pepper and cook, stirring, until lightly colored, about 2 minutes. Toss in green vegetables. Cook, stirring, until wilted and liquid has evaporated, about 5 minutes. Take off the heat and allow to cool slightly, about 5 minutes. Stir in egg, cheese and herbs.

Roll: On a lightly floured work surface, roll out pastry to a 12-inch circle. Roll around the pin and unroll onto a parchment-paper-lined baking sheet. (Alternatively, pound pastry with fists on a lightly floured work surface until pastry resembles an oddly-shaped circle. Transfer very carefully onto a parchment-paper-lined baking sheet.)

Fill:
Spread vegetables onto pastry in an 8-inch circle. Fold edges of pastry up and over, forming a casual tart.

Bake: Slide pan into a 400-degree oven, and bake until pastry turns golden, about 35 minutes. Serves 8.

Pastry: Mix well: 1 cup flour, 1/4 cup almond flour, 1 teaspoon maple syrup, 1/4 teaspoon fine salt and a few grinds of pepper. Drop in 9 tablespoons cold unsalted butter, cut into slices. Cut butter into flour mixture with two forks until lumps range in size from cornflakes to crumbs. Drizzle in up to 5 tablespoons cold water, folding with a flexible spatula or fork, until pastry comes together. Pat into a thick disk or ball. Wrap in waxed paper and chill at least 1 hour.

I am sharing my recipe with Simply Sugar and Gluten Free.

Happy Birthday Spaghetti Squash with Polenta

A few weeks ago I tried my hand at polenta croutons. The crispy cubes of cornmeal were nice accompaniments to a garden salad. Shortly after my first foray into preparing polenta, my friend/colleague Kristi made the polenta croutons and added them to a tasty vegetarian/vegan entree that she created.

Start with a spaghetti squash – Heat the oven to 400°F. Cut the squash in half lengthwise and scrape out the seeds. Brush the flesh with 2 tablespoons of the oil and season with salt and pepper. Place the squash halves cut-side up on a baking sheet and roast until fork tender, about 50 minutes. Remove the squash from the oven and let sit at room temperature until just cool enough to handle. Scrape the flesh with a fork to make long strands; set aside.

Heat a skillet with oil on medium-high heat. Saute sliced onion, diced tomatoes, sliced zucchini, chopped garlic and capers. In a separate skillet, cook the polenta croutons. Place the sauteed mixture on top of the spaghetti squash and add polenta croutons to garnish. Serve hot and enjoy.

Thanks, Kristi, for this inspired dish. Have a happy birthday!

I am sharing this recipe with Simply Sugar and Gluten Free.

Chicken and Strawberry Salad

I have always loved this recipe for Strawberry and Chicken Salad ever since I first saw it in the May 2009 edition of Cooking Light magazine. When I picked up our half-share of our local farm’s community-supported agriculture (CSA) program and found that it included both a quart of native strawberries and a head of romaine lettuce, SensitiveHusband and I knew what we were having for dinner!

We made a few changes to remove the yeast and sugar from this meal. In the dressing, we replaced the sugar with agave nectar and the red wine vinegar with fresh lemon juice. Instead of using a rotisserie chicken from the grocery store, which is convenient yet typically has sugar and other preservatives injected under the skin, we sautéed some chicken tenderloins with olive oil, salt, pepper, and fresh parsley and basil. You may notice that there is a slice of crusty bread on my plate. Hooray! I found a baguette made by Against the Grain that is free from gluten, yeast and sugar. The taste is pretty good and rounded out our meal nicely.

Our dinner was delicious. The blend of salad, chicken, and dressing was light and refreshing. I enjoyed the baguette warmed with butter. The leftovers made a great sandwich the next day.

Ingredients
Dressing:
2 tablespoons agave nectar
4 tablespoons freshly squeezed lemon juice
2 tablespoon water
1/4 teaspoon salt
1/4 teaspoon freshly ground black pepper
4 tablespoons extra-virgin olive oil

Salad:
4 cups torn romaine lettuce
4 cups arugula
2 cups quartered strawberries
12 ounces skinless, boneless sauteed chicken tenderloins
2 tablespoons unsalted cashews or peanuts
1/2 cup (2 ounces) crumbled gorgonzola cheese

Preparation
1. To prepare dressing, combine first 5 ingredients in a small bowl. Gradually drizzle in oil, stirring constantly with a whisk.
2. To prepare salad, combine romaine and next 4 ingredients (through chicken) in a bowl; toss gently. Place about 2 cups chicken mixture on each of 4 plates. Top each serving with 1 1/2 teaspoons cashews and 2 tablespoons cheese. Drizzle about 4 teaspoons dressing over each serving.

P.S. If you haven’t already done so, please take the two-click poll on my home page. The question is to choose your favorite dessert flavor. Happy choosing!

I am sharing this recipe with Simply Sugar and Gluten Free, Miz Helen’s Country Cottage, Food Trip Friday and Carole’s Chatter.

Garlic Shrimp with Quinoa is a Gluten Free Treat!

A few months ago, I shared a delicious recipe for garlic shrimp with pasta that was created by my MIL and FIL. SensitiveHusband and I just love this meal because it is fairly quick and easy to prepare, especially if we work on it together. However, we recently tried a variation of this dish that was also quite good – instead of tossing the shrimp and peas with pasta, we used quinoa.

Keen-what? Quinoa (pronounced KEEN-wah) is an amino acid-rich seed that has a slightly crunchy texture and nutty flavor when cooked. Most commonly considered a grain, quinoa is actually a relative of leafy green vegetables. Click on this web site from the George Mateljan Foundation for a helpful chart that shows the daily percentages of magnesium, folate and other nutrients in quinoa. It is also gluten free, which is a welcome benefit to many people’s diets.

In order to make this dinner, follow the instructions for MIL and FIL’s Garlic and Shrimp Pasta. Just cook up some quinoa instead of the pasta and toss with the shrimp and garlic at the end to serve. Enjoy this dinner!

I am sharing this recipe with Simply Sugar and Gluten Free, Miz Helen’s Country Cottage and Food Trip Friday.

Stirring and Statistics for Risotto with Sausage and Spinach

This past Friday night, I boldly stirred something I had never stirred before…risotto. Risotto is an Italian rice specialty made by stirring hot stock into a sautéed rice mixture (thanks, Epicurious, for the definition). The slow addition of hot stock allows the rice to release starch, which gives risotto a creamy consistency.

I had never before made risotto, although I found a recipe in the January 2012 edition of Cooking Light magazine that caught my eye. I made my substitutions (including adding garlic, eliminating the shallots, using homemade chicken stock, substituting the white wine with water, and finding a chicken sausage without yeast, sugar or onion) and followed the directions closely, which yielded a delightful result. However, I learned a few things about risotto that I want to share with you so you can learn from my novice mistakes:

(1) Prepare all of the ingredients ahead of time. This is because once you start stirring, you will find it hard to stop. Fortunately, I prepped fairly well ahead of time so my mushrooms were sliced, garlic was minced, sausage was diced, and other ingredients were accessible. The spinach however, remained in the bag, unwashed. As I stood stirring at the stovetop, watching with amazement as the rice slowly became a creamy risotto, it became clear that the leafy green vegetable was not going to wash itself. I felt relief when SensitiveHusband walked in the door, home from work. I was so happy that he was home so we could chat, enjoy a good meal, and he could wash the spinach.

(2) When the recipe calls for “constant stirring,” it is not kidding. Pull up a chair, hold a good book in one hand, and keep stirring with the other hand. I was able to take mini-breaks, but once you wipe the sweat from your brow, return to stirring.

I found a few other good tips from Susan Russo for NPR, but as long as you follow this recipe you should not have any trouble getting the correct result.

While I was stirring, I had some time to think, and my thoughts drifted to rice production. So after dinner I did some research. Most risottos are made with arborio rice, which is mostly cultivated in Italy. The U.S. is a net exporter of rice, growing mostly long- and short-grain varieties. About 99% of the total U.S. rice crop is produced in four regions:
1. Arkansas Grand Prairie (Arkansas is the largest single rice producing state with about 45% of rice producing acreage);
2. Mississippi Delta (includes Arkansas, Mississippi, Missouri and Louisiana);
3. Gulf Coast (Texas and Southwest Louisiana); and
4. Sacramento Valley of California.

The USDA’s rice outlook from February 10, 2012 notes that the 2011-12 global rice production forecast was raised 1.3 million tons to 462.7 million tons, which is the largest crop on record. It looks like Italy’s arborio rice crop is expected to be a good one this year, so enjoy your risotto!

Ingredients
* 3 cups (homemade or) fat-free, lower-sodium chicken broth
* 1 1/3 cups water
* 1 tablespoon extra-virgin olive oil
* 1/8 teaspoon salt
* 1 (8-ounce) package sliced mushrooms
* 5 ounces sweet Italian sausage, casings removed and diced (about 2 links)
* 5 garlic cloves, minced
* 1 cup uncooked arborio rice
* 1 (6-ounce) package baby spinach
* 1/4 cup (1 ounce) shaved fresh Romano or Parmesan cheese

Preparation
1. Bring broth and 1 cup water to a simmer in a small saucepan (do not boil); keep warm over low heat.
2. Heat a Dutch oven over medium-high heat. Add oil; swirl to coat. Add salt and mushrooms to pan; cook for 8 minutes or until browned, stirring occasionally. Remove mushrooms from pan, and set aside.
3. Add sausage to pan, and cook for 3 minutes or until browned. Add garlic; cook 1 minute, stirring constantly. Reduce heat to medium. Add rice; cook for 1 minute, stirring constantly. Stir in 1/3 cup water, and cook until liquid is nearly absorbed, scraping pan to loosen browned bits.
4. Stir in 1 cup broth mixture; cook for 2 minutes or until liquid is nearly absorbed, stirring constantly. Add remaining broth mixture, 1/2 cup at a time, stirring constantly until each portion of broth mixture is absorbed before adding the next (about 30 minutes total). Remove pan from heat. Add mushrooms and spinach; stir until spinach wilts. Top evenly with cheese. Serve and enjoy immediately.

I am sharing this recipe with Simply Sugar and Gluten Free, Miz Helen’s Country Cottage, Food Trip Friday, Cybele Pascal Allergen-Free Cuisine and Simple Living with Diane Balch.

Steak Tips with Mushroom Sauce

The grocery store recently had grass-fed steak tips on sale, and they looked quite fresh so I picked some up for dinner. When I got home I searched the Internet for some inspiration and found a recipe for steak with mushroom sauce. I had some frozen beef broth that I had made (yeast and sugar free) and made a few other changes to remove the onion. SensitiveHusband and I were really happy with the result. It was great enjoying a homemade sauce with our steak! Our sides included brown rice and roasted Brussels sprouts with grapes. We had a great meal.

Ingredients
1 pound sirloin tips
1 cup beef broth (homemade is my favorite)
8 oz mushroom caps, sliced
3 tbs butter
2 cloves garlic, chopped
1/2 teaspoon dried thyme
1/4 teaspoon salt, or to taste
1/2 teaspoon ground black pepper, or to taste
2 tablespoons all-purpose flour

Directions
Preheat an outdoor grill for medium-high heat. 

Melt butter in a large skillet over medium-high heat. Add mushrooms and cook about 5 minutes. Deglaze the pan with half of the beef broth. Increase heat and bring to a boil. Allow the mixture to boil until it has reduced by 1/3.

Meanwhile, grill the sirloin tips to desired doneness. Season with salt and pepper if desired.

When the sauce is reduced, stir in the other half of beef broth, and garlic. Return to a boil, and continue to cook for another 5 to 10 minutes. Sauce will be thin like au jus. Whisk in flour, and cook until the sauce is the desired thickness. Taste and adjust seasoning if necessary. Serve tips with mushroom sauce.

This recipe is being shared with Simply Sugar and Gluten Free, Food Trip Friday, Miz Helen’s Country Cottage and Cybele Pascal Allergen-Free Cuisine.

Baked Cornish Game Hens: A Fun Dinner Option

I like serving Cornish game hens when I am looking for something festive that does not require roasting an entire chicken or turkey. They don’t take too long to prepare and are really tasty, therefore good for celebration meals as well as any dinner. Cornish game hens have a lot of nutrients and are good sources of some B vitamins, phosphorous, zinc and riboflavin, among others.

SensitiveHusband and I prepared these on New Year’s Eve, diverging from the original recipe by reducing the butter and swapping the onion with a carrot. We also used thyme instead of oregano. Serve with any of your favorite starch and vegetable – we had couscous and roasted brussels sprouts.

Ingredients:
2 Cornish game hens
1/3 cup melted butter, divided
1/2 stalk celery, chopped
1 carrot, chopped
12 button mushrooms, chopped
2 cloves garlic, minced
1 tablespoon dried basil
1 teaspoon dried thyme
1 tablespoon chopped fresh parsley

Preparation:
–Preheat oven to 325 degrees F.
–In a small bowl combine 1/4 cup melted butter, celery, carrot, mushrooms, garlic, basil, thyme and parsley.
–Season hens inside and out with salt and pepper to taste, then stuff with equal amounts butter/vegetable mixture. Place stuffed birds in a 9×13 inch baking dish, breast side up. Drizzle with 1/4 cup melted butter and sprinkle with parsley.
–Cover dish with aluminum foil and bake in the preheated oven for 1 1/2 hours. Remove cover and brown at 500 degrees F.

I am sharing my recipe with Simply Sugar and Gluten Free and Food Trip Friday.

Roasting a Turkey with Pan Gravy: A Novice’s View

This turkey marked a very special day because it was the first time that SensitiveHusband and I roasted together as we hosted our family for Thanksgiving. Everyone says that roasting a turkey is easy but we had a number of questions about the cooking method that we first had to research. Should the turkey have an aluminum foil tent or not? Is the slow-roast method better than beginning with high heat followed by a lower temperature? Should we purchase a fresh or frozen turkey? And then there is the age old question – to stuff or not to stuff? SensitiveHusband and I researched by asking experienced turkey roasters, consulting the Internet, and reading Cooks Illustrated. And then it was time for us to “wing it.”

I wish I could have taken a picture of us preparing the turkey, but I couldn’t since both of us were handling the 16-pound bird. I am sure we looked like a comedy team! It was a bit awkward rinsing the turkey that had just been thawed and removing the giblets. I won’t give too many details about this step in the process, although if you look hard enough you will find a bag of giblets and they should be removed before putting the turkey in the oven. Also, please note that when selecting a turkey, check the ingredients. Many companies add a brine solution that has sugar or salt in it, among other things. So check the label and make sure that the turkey you select is safe for your family to eat.

We placed our rinsed turkey on a roasting rack which was inside a beautiful roasting pan, given to us by our friends as a wedding present. We chopped a few carrots and celery stalks and placed them both inside the bird as well as in the roasting pan. Two cups of water also was placed in the bottom of the pan. Even though we did not add stuffing, we did add the carrots and celery along with some fresh herbs (parsley and theme), about two tablespoons of melted butter, and some orange and lemon wedges to add moisture and fragrance inside the hollow cavity of the turkey.

We smoothed a bit more of the melted butter (about 2 tablespoons) all over the oustide of the turkey along with salt, pepper and parsley. Then we tented the turkey with aluminum foil and baked at 350 degrees for approximately 3 1/2 hours, or until the thermometer reached the appropriate temperature. (A rule of thumb about roasting an unstuffed turkey is at 350 degrees it will take about 15-20 minutes per pound.) About one hour before we anticipated the turkey being done, we removed the aluminum foil tent so that the turkey could brown. We also basted the turkey with the pan juices at that time.

After the turkey came out of the oven, we let it rest for approximately 1/2 hour before carving so that the juices could redistribute.
And at that time we worked on the gravy. We used about one cup of the turkey dripping/water mixture from the bottom of the roasting pan, and poured it into a separate saucepan. On medium heat we scooped in a few tablespoons of flour and stirred constantly to keep the liquid from getting lumpy. We also seasoned with salt, pepper, parsley and thyme. After a few minutes the liquid was not thickening very much, so we added a teaspoon of cornstarch and that helped.

It was a great first foray into the world of turkey roasting! What we learned from the experience is that there is nothing exact about roasting a turkey. Measurements are approximations, as is the cooking time. And when you ask people how they prepare the meal, you will get a variety of answers. That’s one of the reasons that roasting a turkey is so special, because the result is a little different every time and for every person. We also learned that it takes a lot longer to prepare the turkey for roasting than we had anticipated – allow an hour so you won’t feel rushed. The day of roasting a turkey is one where you can enjoy being home, smell delightful aromas, and enjoy the company of your guests.