Tag Archives: Gluten free

Fall Equinox Favorites: (Gluten/Sugar/Nut Free) Pesto and Watermelon Granita

rosesHappy Fall Equinox, everyone! Our weather is absolutely spectacular and we are enjoying a bounty of fresh fruits and vegetables. SensitiveHusband and I are stretching out the summer feeling by being outside and making some fresh foods that freeze well. These roses are from my garden – they smell like honey and look pretty and delicate.

pesto
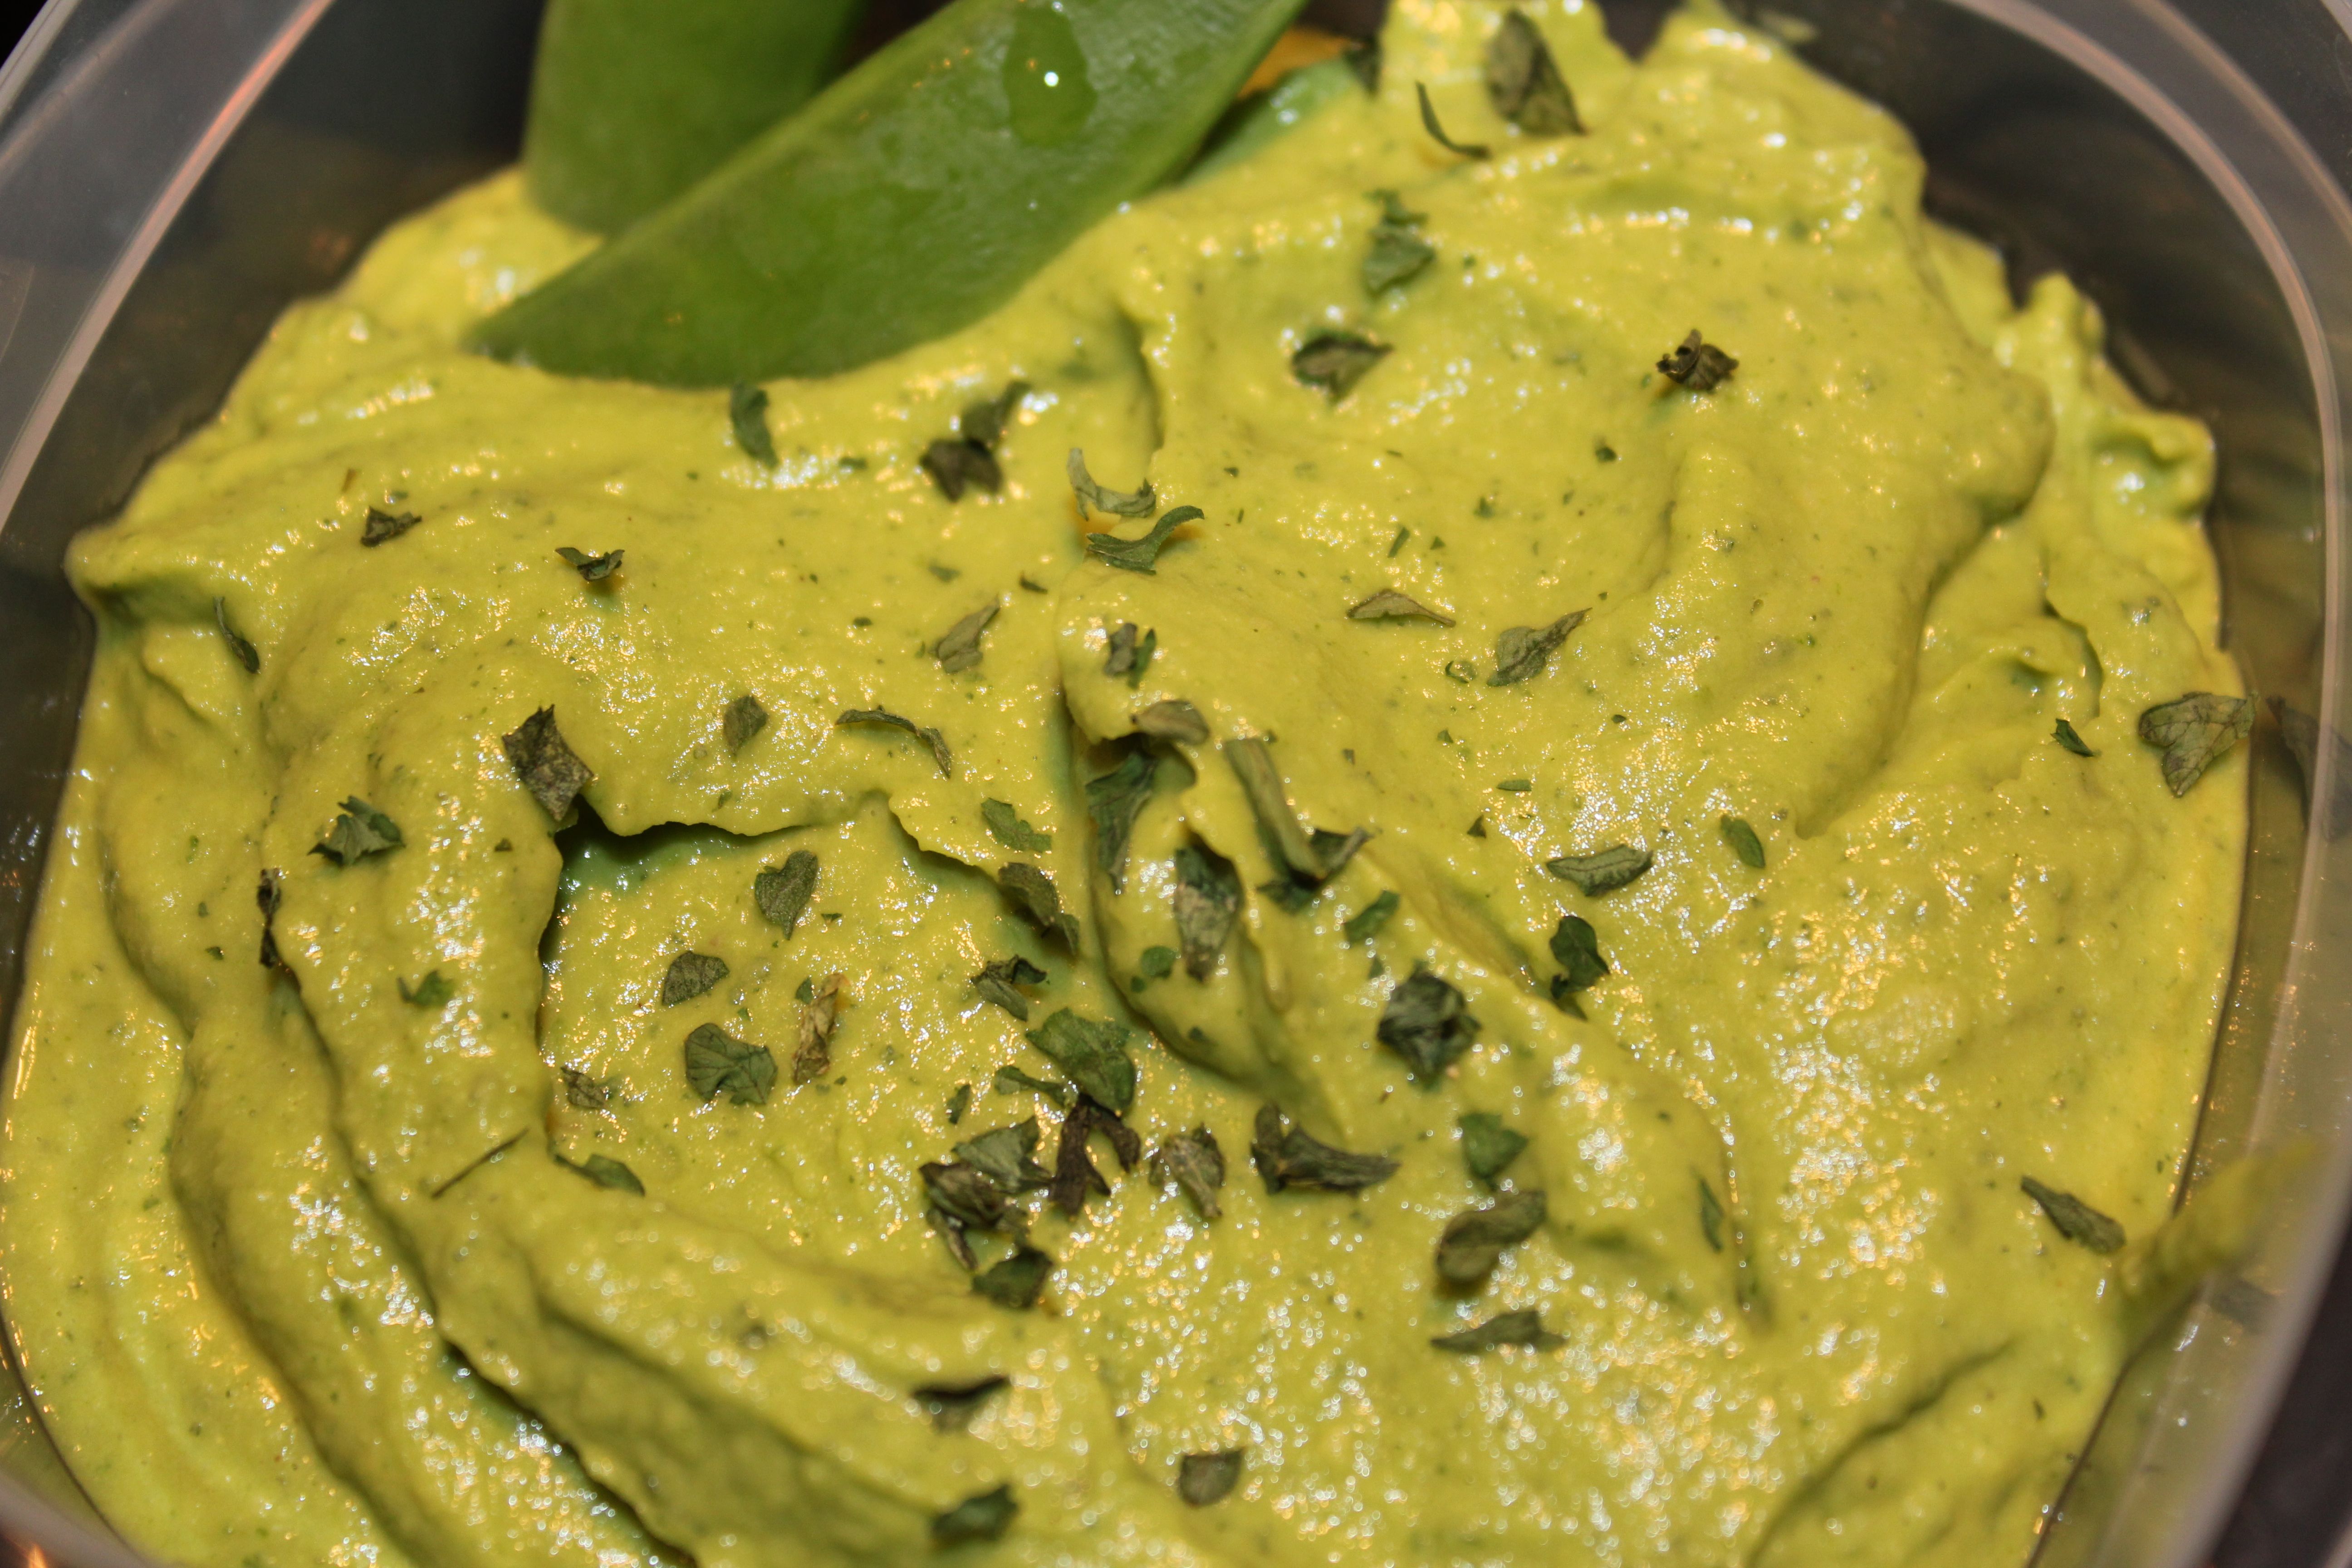
One of the summer foods that we have been consistently eating is pesto. We like fresh pesto as a replacement for mayonnaise or mustard on a sandwich, and it’s also great on a cracker or carrot stick. Pesto is really quick to make although the first time I felt like making it I did not have any pine nuts, a common ingredient, on hand. So I found inspiration from the Farmers’ Almanac – and used chickpeas instead! Here is my interpretation of a summer favorite that can easily be frozen and savored throughout the cooler months.

Nut-Free Pesto (or Pistou) Ingredients:
1 cup fresh basil, washed
1/4 cup chickpeas, rinsed
1/3 cup grated cheese (I like Parmesan and Pecorino Romano)
1 clove garlic, peeled
1/4 cup olive oil
1/4 cup canola oil
pinch of kosher salt
juice from 1/4 lemon

To prepare, place all of the ingredients in a food processor and pulse until desired consistency. Store in the refrigerator for up to one week or freeze for later use.

granita
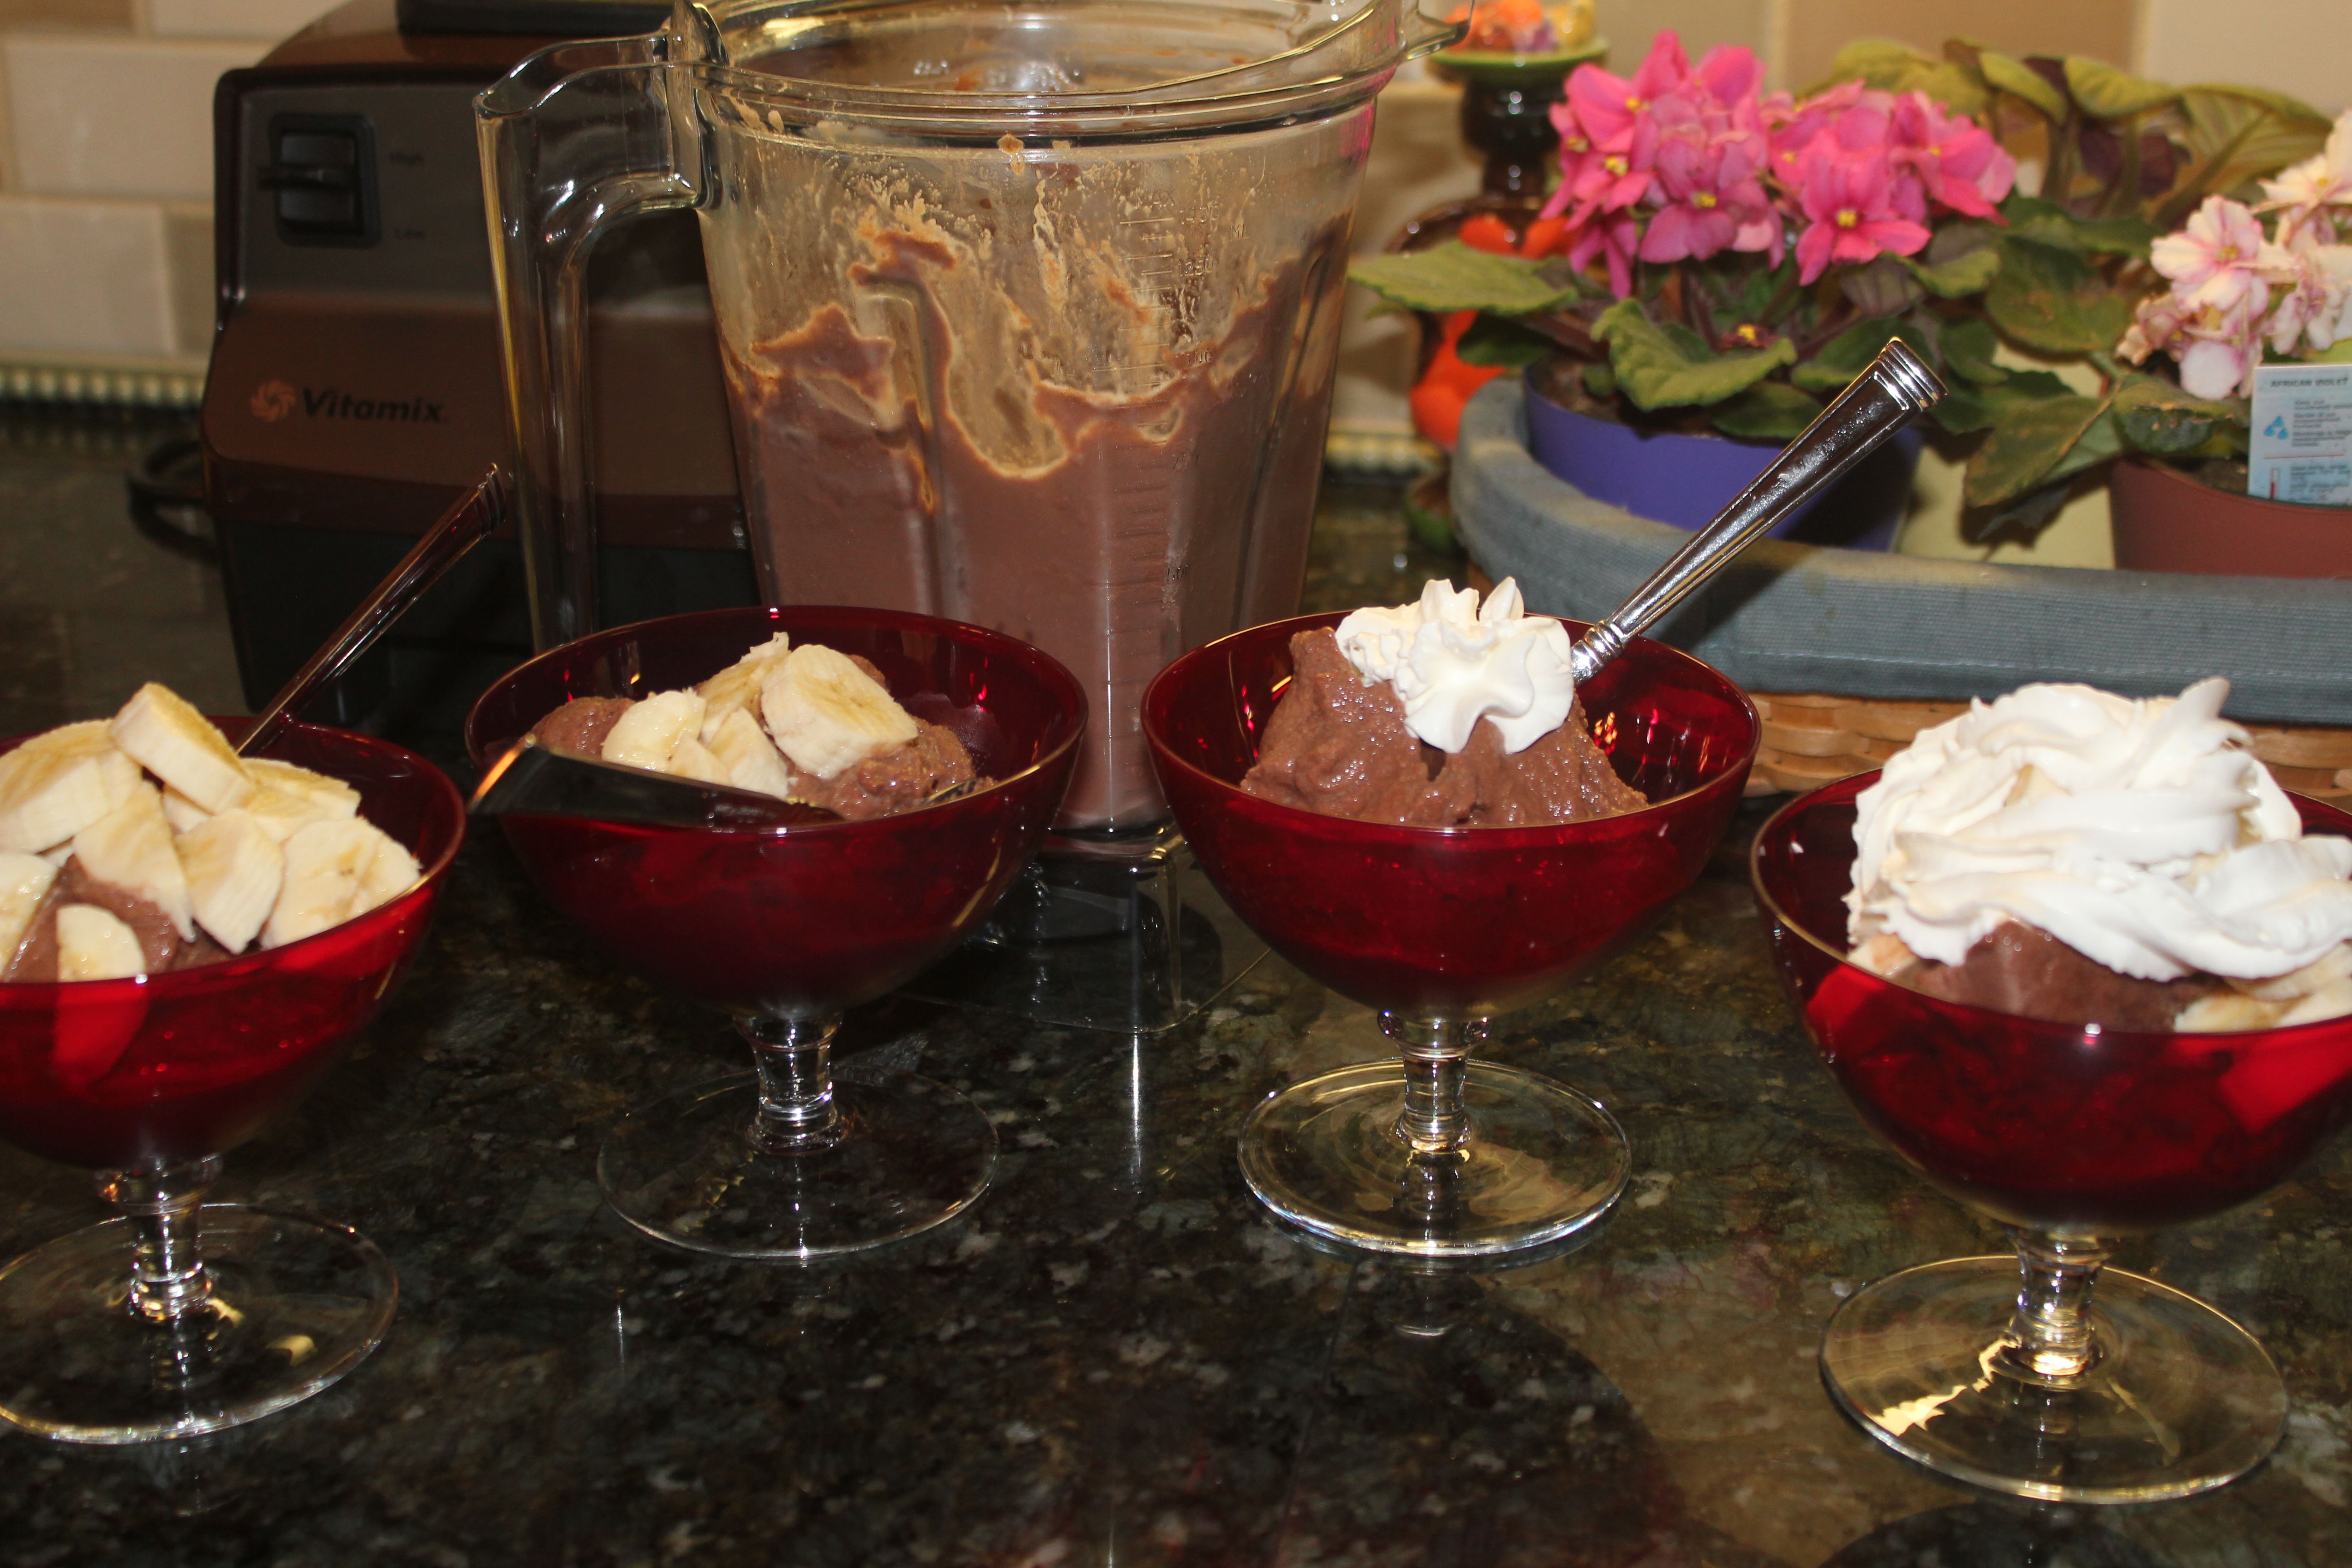
Another way to prolong the summer foods is by making a granita, which is similar to a frozen ice. The results for this next recipe is from you and everyone who shared an opinion to the poll question: What is your favorite summertime food? The results were close, although watermelon won out with 27% of the votes. I found a recipe for a watermelon granita from Ellie Krieger, and instead of using cane sugar I used agave nectar. This is a nice way to sweeten watermelon that is not quite as flavorful as it was during the height of the summer, and you can keep it frozen for awhile and enjoy as the temperatures turn cooler. The first time I made the granita, I thought the flavor of the mint was overwhelming so the recipe below tones down the amount used.

Watermelon Granita Ingredients:
4 cups seeded, cubed watermelon
1/3 cup fresh lime juice
1/8-1/4 cup mint, finely chopped, plus more for garnish
1/3 cup agave nectar

To prepare, puree watermelon in a food processor. Strain puree through a sieve and strain out solids, forcing liquid out with a wooden spoon. Discard solids. Combine the watermelon puree, lime juice, mint and agave nectar in a 9 by 13-inch metal pan. Place mixture in the freezer, scraping thoroughly with a fork every 30 minutes for about 2 1/2 hours, or until the granita resembles coarse crystals. Scrape 1 last time and spoon into parfait glasses or bowls. Top with a mint sprig.

Since it is the Fall Equinox and the season for apples and pears, it is time for a new poll! What is your favorite way to enjoy apples and pears? Do you like to eat them straight from the tree, or do you prefer to indulge in a pie or other dessert? Please vote for your favorite treat by clicking on my home page, choosing your answer, and clicking ‘vote.’

Advertisement

Sugar and Gluten Free PB&J Cookies

PB&J CookiesHappy Labor Day weekend everyone! The U.S. Census has posted a range of statistics to celebrate the holiday. For instance, in 2012 the largest occupation was retail salesperson; while in 1910 the largest occupation was farmer. The first observance of Labor Day was in 1882 when about 10,000 workers gathered in New York City for a parade. That celebration inspired similar events across the U.S., and by 1894 more than half the states were observing a “workingmen’s holiday” on one day or another. Later that year, President Grover Cleveland signed the bill making the first Monday in September “Labor Day.”

I hope that you are enjoying the long weekend. It’s always nice to have an extra day to relax and to enjoy a range of activities, which for me includes baking. For some of you it may mean back to school, which in my case includes memories of peanut butter and jelly sandwiches. Perhaps my thoughts around this time of year inspired me to try a version of Jack Deen’s Peanut Butter & Jelly Thumbprint Cookies that I noticed in the September 2, 2013 edition of People Magazine.

I removed the two types of sugar and substituted with coconut palm sugar and honey. I used my cane sugar free brand of strawberry jam, and also tried some with chocolate chips, as the middle garnish. I hope you like this sugar free version of a very tasty cookie.

Ingredients:
1 cup peanut butter
1/3 cup coconut palm sugar
3 tbs honey
1 large egg
1tsp vanilla extract
strawberry jam* (or chocolate chips^)

*St. Dalfour is a great brand of jam without cane sugar
^Endangered Species makes chocolate bars that are gluten and refined sugar free that you can cut into chunks

Preparation:
1. Preheat oven to 350 degrees.
2. Beat peanut butter, sugar, honey, egg, and vanilla extract at medium speed with an electric mixer until blended. Spoon heaping tablespoonfuls of batter on a parchment paper-ined baking sheet. Flatten dough with a fork. Make a 1/2 inch indentation in the center of each cookie using your thumb. Spoon 1/2 tsp jam (or chocolate chips) into each thumbprint.
3. Bake 12 to 14 minutes or until golden. Makes 12 cookies.

Rachel’s Radish Greens Soup

Today’s post is a real treat from a guest blogger! When Rachel is not crunching numbers, she enjoys crunching on fresh vegetables from her new garden. I hope you enjoy her story of discovering the beauty and taste of fresh radishes, and finding a recipe that includes both the root and leaves.

RadishGreensSoupRadishes so tasty they inspired me to write a blog
Radishes are not my favorite food. They are hard, pungent, and have a propensity to be pithy and/or rubbery if left to their own devices for too long a time. So when I was looking to plant my spring garden, I was not inclined to waste precious space on such a disagreeable crucifer. But after reading that radishes can be co-planted with carrots to double up on space (as radishes grow quickly and would be harvested well before the carrots are large enough to need the room) and that this is a great way to break up the soil for the growth of the more tender root vegetables, I decided to spend the $1.89 for a packet of seeds and give it a go.

True to the promise of a quick growing season, last week, some of my first plantings were ready for harvest. I know only a couple of recipes that use radishes, and those call for only the roots. However, the plants looked so lovely and fresh when I plucked them from the ground, it seemed like a waste the throw out 2/3 of the plant, especially after all the work it took to grow them (mainly, to prepare the ground, since once I planted the seeds, they pretty much took off on their own). So I turned to a lovely book given to me by Sensitive Economist, Vegetable Literacy by Deborah Madison, to see what could be done about the greens.

Not only did the book’s section on radishes regale me with tales of gardening in Alabama and give a lesson on the diverse varieties of radishes available (note to self: try planting the milder-flavored French Breakfast variety!), but it also persuaded me to try eating one of the radishes ā€œas the French doā€: raw, tender leaves and all, with a bit of (vegan) butter spread and salt. Magnifique! These radishes were tender and juicy, nothing like the grocery-store radishes I remembered. I ate all three, and had to go back to the garden for more to get the greens needed to make a vegan, sugar-free, yeast-free, gluten-free version of Madison’s delicious radish-top soup recipe.

Even without the butter, yogurt, and chicken stock, the soup has a light, clean, and surprisingly delightful flavor, thanks to the fresh radish greens. It’s perfect for a spring lunch! Unlike the roots, radish greens are very mild, but you can also add thinly sliced radish roots to the soup as well if you want a little more zest.

Radish Greens Soup
–1 tbsp olive oil
–½ onion, thinly sliced (1/4 c of sliced leeks or garlic chives would probably be good, as well)
–4 small or fingerling potatoes (I used the purple variety, which gave the soup a nice, rich color), thinly sliced
–4 cups water
–tops of 10 radishes, rinsed, thick stems removed, and coarsely chopped
–fresh lemons for garnish

Place the olive oil, onion slices, potato slices, and a generous sprinkle of salt (in that order) in the bottom of a large pan over low heat. Cook, covered, for approximately 15 minutes to steam the potatoes and carmelize the onions. Add 4 cups of water and stir, scraping the bottom to incorporate the carmelized onions, and add the radish greens. Cook just until wilted, approximately 5 minutes. Cool, puree, and serve with sea salt, fresh ground pepper to taste, and a slice of lemon squeezed over the top.

I am sharing this recipe with Simply Sugar and Gluten Free.

Chocolate Macaroons are Full of Taste Yet Free (of Gluten, Dairy & Cane Sugar)

Chocolate MacaroonsMacaroons always look very pretty, delicate and light, yet I rarely eat them because they do not have my favorite dessert ingredient, chocolate. I assume that many other people have snubbed a macaroon when deciding what treats to eat from a dessert table since the majority of us agree that chocolate is our favorite dessert flavor.

dessert_flavors_tableThe most recent SensitiveEconomist poll shows that 63% of the 112 respondents would choose a chocolate dessert over any other flavor, with mint coming in a distant second place with 11% of the responses. These survey results mean that when given the choice between a light and flaky macaroon and a slice of chocolate cake, most of us turn to the delicious cocoa. Until now – where we can have both.

Most of you will share in my excitement for Kay Stepkin’s recipe for chocolate macaroons that I read in my newspaper a few weeks ago. What a great way to combine a light and delicate treat with my favorite dessert flavor, chocolate. Plus, this recipe is free of gluten, cane sugar and dairy – and it’s vegan! This is a delicious treat for so many people. I made the dessert for a dinner party and they were an absolute hit! I will definitely be making these again right through the summer.

Speaking of summer, what is your favorite summertime food? Please share your opinion with a simple poll right on my home page. Just click your answer and then click “vote” and you will see the up-to-the minute results. The food with the most responses will probably find itself highlighted as a main ingredient sometime soon on this blog. Thanks for participating!

Ingredients:
3 tablespoons coconut oil, melted
1 cup maple syrup
1 teaspoon almond extract
3 cups unsweetened shredded coconut
1½ cups cocoa powder
½ cup almond meal/flour (or ground almonds)
1/4 teaspoon sea (or kosher) salt
Coconut sugar, optional

Preparation:
1. Heat oven to 325 degrees. Pour coconut oil, maple syrup, almond extract, coconut, cocoa powder, almond meal and salt into a bowl; stir until well combined.

2. Using a large tablespoon of dough per cookie, shape into mounds, packing mixture firmly. Distribute cookies onto a parchment-covered baking sheet. Do not press down.

3. Bake for 15 minutes. When cool, dust with a little coconut sugar.

Makes about 22 cookies.

Additional Notes:
(1) For the almond meal, you can substitute with almonds ground up in a food processor.
(2) If you would like this recipe to be nut free, substitute the almond extract with vanilla extract, and replace the almond meal with brown rice flour.
(3) Since the coconut oil will be solid in the jar to start, microwave until melted and then spoon out the liquid oil for the recipe. After the coconut oil cools it will return to its solid state.

I am sharing this recipe with Simply Sugar and Gluten Free and Food Trip Friday.

(Gluten and Refined Sugar Free) Cinnamon Raisin Muffins

cinnamon raisin muffinsGood day everyone! Since I had some extra garbanzo bean flour in my cupboard, I decided to figure out how to use it. I found a delightful recipe for chocolate chip muffins that used that type of flour, and I decided to change it a bit so that I would make cinnamon raisin muffins. The result was a beautiful, golden-brown muffin that tastes great…and is free of gluten and refined sugar too!

Ingredients
1 cup garbanzo bean flour
1 tsp baking powder
½ tsp cinnamon
½ cup coconut palm sugar
ā…“ cup milk (almond milk for a dairy free option)
2 eggs
2 tbsp grapeseed (or canola) oil
2 tsp vanilla extract
ā…” cup raisins
3 tbsp gluten-free granola, optional

Preparation
Preheat oven to 375 degrees and line a 12 cup muffin pan with muffin liners. Set aside.

Combine dry ingredients in a small bowl and set aside. Whisk wet ingredients together in a large bowl. Add dry ingredients to wet and mix until incorporated. Fold in raisins.

Divide muffin batter into prepared muffin cups and sprinkle the tops of the muffins with granola, if desired. Bake in preheated oven for 20-22 minutes, or until toothpick inserted comes out clean.

PS: For my friends who receive my blog posts via email, I apologize for the previous email. My keyboard commands recently changed and I posted a blog rather than making a word have a bold font. Whoops!

I am sharing my recipe at Simply Sugar and Gluten Free, Cybele Pascal Allergy-Friendly Cook, and Food Trip Friday.

Minding the Vitamix – Part 4/Finale: Chocolate Ice Cream

Chocolate Ice CreamThe alternate title for this blog post is: See you soon, old friend.

MIL and FIL returned from their trip and wanted to tell us about their travels…along with seeing their new Vitamix blender! I kept it good company while they were away by making turnip and potato soup, strawberry muffins, and spinach hummus. But I knew I had to try my hand at one more item before handing the appliance over…and that was a recipe for chocolate ice cream. The Vitamix cookbook had a recipe that looked fairly easy, and it only required me to substitute the sugar with maple syrup. There are only six ingredients needed and the time between measuring the ingredients and trying a spoonful of dessert is about five minutes. The result is what I would describe as a cross between a frozen ice and a gelato. It’s a refreshing treat that you can garnish any way you choose.

So now the Vitamix blender has been delivered to MIL and FIL’s house. Although I will offer to keep it company the next time they travel so I can try some new concoctions. See you soon, old friend.

Ingredients:
1 cup milk
1/2 cup unsweetend cocoa powder
1/3 cup maple syrup
1/2 cup nonfat dry milk
1 teaspoon vanilla extract
4 cups ice cubes

Preparation:
Place all ingredients into the blender in the order listed and secure lid.
Turn machine on and slowly increase speed to High. You may need to use a tamper to press the ingredients into the blades.
In about 45 seconds, the sound of the motor will change and four mounds should form.
Stop machine. Do not over mix or melting will occur. Serve immediately.

I am sharing this recipe with Simply Sugar and Gluten Free…and am happy to be featured too!

Minding the Vitamix – Part 2: Fresh Green Hummus

green hummusThe alternate title for this blog post is: Top of the morning – and the balance of the day – to you!

MIL’s Vitamix blender continued to sit on my counter, so I thought I would try my hand at one of my favorite snacks, hummus. Hummus is an Arabic word meaning “chickpeas” and is made by mixing mashed chickpeas with oil, lemon juice and other seasonings. I had never made my own hummus before, preferring the convenience of a store-bought package. I now realize how easy it is to make and how creative I can get with the seasonings.

Since today is St. Patrick’s Day, I thought I would try making hummus seasoned with spinach so that its hue would match the official color of the day. If you do not have spinach on hand, other green, leafy vegetables like parsley, basil or kale would do well. My inspiration for this recipe is from Just a Pinch’s White Bean Green Hummus.

Ingredients:
1 can garbanzo beans, rinsed and drained
2 oz fresh spinach leaves, rinsed (about one large handful)
2 tbs dried parsley
2 cloves garlic, peeled
juice from 1 lemon
1/3 cup olive oil
salt and pepper, to taste

Preparation:
Using a food processor or Vitamix blender, pulse all ingredients until desired consistency is reached. Serve with pita points, crackers, or vegetable slices.

May you always have walls for the winds,
a roof for the rain, tea beside the fire,
laughter to cheer you, those you love near you,
and all your heart might desire.

I am sharing this recipe with Simply Sugar and Gluten Free.

Minding the Vitamix – Part 1: Turnip, Apple & Potato Soup

turnip soupThe alternate title for this blog post is: Sending My Condolences to the 30-Year-Old Blender.

A few weeks ago my mother-in-law called me to say that her trusty decades-old blender had stopped working that morning. It just conked out while making a smoothie! I offered my condolences because the blender had been a staple in MIL and FIL’s kitchen for some time. However, as MIL noted, all was not lost, because the Vitamix blender that she had her eye on had just gone on sale! She wanted to purchase the new appliance but knew that she would be starting a vacation soon after, and did not want her shiny, new blender to be sitting on her front step. So being the generous DIL that I am, I offered to have it shipped to my house, where I could take it in. And I offered to go one step further – I would test out the new Vitamix. After considerable laughing on both sides of the phone, we decided to venture forth with this plan.

The Vitamix arrived on my doorstep on a Thursday evening. I opened the box to reveal the machine that had a very pretty cinnamon hue. I spent most of that weekend just reading the manual and all of the cookbooks that came with it. There was quite a bit of reading material! By Sunday afternoon I was ready to try my first creation – Turnip Soup! I enjoy roasted turnips and had never tried making a soup that required blending. Now was the time!

I peeled and cubed the turnip before roasting so the vegetable became very tender. I chopped the potatoes and apples yet left the skins on because I figured the Vitamix would blend all those pieces well, which it did. If your blender is not as powerful you may want to peel those items.

Turning a Vitamix blender on for the first time is quite an experience. Please note that any lightweight items (such as napkins, nuts, etc.) on any nearby counterspace will move as a result of the wind current created. The hum is distinctive, kind of like an airplane taking off but not as loud. That Vitamix had the food blended in no time! I had to blend a few batches, which got to be kind of a messy experience, but the blender is really easy to clean. Below are the steps I took to a very tasty blended soup with roasted turnip, apple and potato. I hope that you like the soup as much as SensitiveHusband and I did.

Ingredients:
1 turnip, peeled and cubed
2 apples, peeled (optional), cored, and coarsely sliced
2 russet potatoes, peeled (optional) and cubed
2 tablespoons butter
2 cups vegetable broth (I like Pacific Natural Foods Mushroom Broth)
4 cups water
4 cloves garlic, peeled
salt and pepper to taste

Preparation:
Cut turnips into (roughly) same-sized pieces, about ½ inch to 1 inch thick, depending on diameter. Don’t worry about precision because the soup is going to be blended anyway. Place turnip pieces in a 9×13 glass pan lined with parchment paper. Toss with olive oil, salt and pepper, and then bake at 375 degrees for 45 minutes. Let cool before blending.

Peel the potato and cut it into pieces about the same size as the turnip.

In a heavy-bottomed soup pot, heat the butter over a low-to-medium heat.

Add the garlic and cook for 2-3 minutes.

Add the broth, water and potato. Increase the heat to medium-high and bring to a boil. Then lower the heat and simmer for 15 minutes or until the potatoes are soft enough that they can easily be pierced with a knife.

Remove from heat and purƩe the potato and liquid in a blender along with turnip, working in batches if necessary.

Tip: Use care when processing hot items in a blender as the hot steam can sometimes blow the blender lid off. Start on a slow speed with the lid slightly ajar to vent any steam, then seal the lid and increase the blending speed.

Return purƩed soup to pot and bring to a simmer again, adding more broth or stock to adjust the thickness if necessary.

Season to taste with salt and pepper. If desired, add a garnish such as sauteed garlic and kale.

Lentil Vegetable Soup

2013-01 lentil veggie soupI have really been enjoying soup lately. With the cold temperatures outside and frequent snowfall, it’s nice to know that a fresh, hot cup of soup can be ready in minutes. Soup is a great way to incorporate a variety of vegetables into a meal, and by adding lentils it is hearty enough for an appetizer or a whole meal. An article in the Proceedings of the National Academy of Sciences late last year finds evidence that humans evolved with larger brains because they cooked their food, which allowed more energy and nutrients to be absorbed in their bodies. It sounds like eating homemade soup is both tasty and a smart thing to do.

I wanted to try making a lentil soup, since you do not have to spend time soaking or peeling lentils – just rinse and add to the soup. This is a time saver over dried beans. I found an online recipe for Chunky Vegetable-Lentil Soup from Better Homes and Gardens, and made a few modifications to remove the onion and boost the number of veggies. I added peapods to my soup, and in my next batch I added spinach, which both worked well and added to the flavor. This soup tastes even better on the second day once the vegetables have a chance to meld. When reheating, you may choose to add another cup of water because the lentils, over time, will soak up moisture and the soup will thicken.

I hope you enjoy this delicious soup.

Ingredients
1 tablespoon olive oil
1 clove garlic, minced
1 cup dry green lentils, rinsed and drained
1 pound whole small mushrooms, sliced
4 medium carrots, thinly sliced (2 cups)
2 stalks celery, chopped
3/4 cup favorite vegetable (such as peapods or spinach) – optional
4 cups water
2 cups vegetable broth (I like Pacific mushroom broth)
1/4 teaspoon salt
1/4 teaspoon ground black pepper

Directions
In a 4-quart saucepan, heat oil over medium heat. Add garlic; cook for 2 to 3 minutes until garlic is tender, stirring occasionally. Stir in lentils; cook and stir 1 minute.

Add mushrooms, carrots, celery, any other favorite vegetable, water, vegetable broth, salt and pepper. Bring to boiling. Reduce heat and simmer, covered, about 25 minutes or until lentils are tender.

Herb and Vegetable Omelette

Good day, everyone! I hope that this blog post finds you doing well. This past week has brought both tragedy and triumph, especially for those living on the East Coast of the U.S. Hurricane Sandy brought much destruction and devastation particularly to those in the New York City metro area. I continue to send my good thoughts and wishes to those still adversely affected by this storm. Our one downed tree, which fortunately missed our house, is a small price to pay compared to those who have lost their homes.

As for the triumphs, there have been a number of things to celebrate over the past weeks. Thanks to my colleague/friend, I was able to join her in seeing the Dalai Lama! What an amazing experience to be in the presence of a spiritual leader. And yesterday SensitiveHusband and I attended the wedding of close family friends – needless to say there was much celebrating, visiting, well wishes, and fun dancing.

Another interesting thing that happened this week was my purchase of a vintage Armani blazer at a “posh tag sale” – my first piece of clothing of this caliber will happily be incorporated into my professional wardrobe.

Speaking of interesting…this week I made the frozen chocolate bananas for a work function. There were a few left over, so my colleague/friend Kristi (of Dalai Lama ticket fame) brought them home and let her Vitamix do its magical mixing. The result was a yummy milkshake-like treat that was free of dairy, gluten and cane sugar.

I also tried my hand at a small omelette since I had some leftover vegetables and herbs that I didn’t want to waste. An omelette is a great snack or meal for any time of the day or night, and it is as versatile as you are creative. Here is my take on a personal-sized Veggie Omelette:

Ingredients:
3 eggs
1 pat of butter
8 thin zucchini slices (raw or roasted leftovers)
1/2 teaspoon chopped parsley
6 basil leaves (shred 4 leaves, leave 2 leaves intact)
1 teaspoon Pecorino Romano cheese (or other grated cheese)
1 tablespoon Asiago cheese (or other shredded cheese)

Preparation:
Heat a nonstick skillet to medium high heat. Melt a small pat of butter in the pan. Once the skillet is heated, pour in the three beaten eggs. Allow eggs to lightly set in the pan, about 30 seconds, and then add the zucchini, parsley, four shredded leaves of basil, and Pecorino Romano cheese. When eggs start to bubble and the sides are loosened from the pan (about two minutes), flip the eggs over (you may want to fold over half and then unfold). Allow to cook until golden brown, about another two minutes. Slide cooked creation onto a plate, and garnish with Asiago cheese and two basil leaves.

I am sharing this recipe with Simply Sugar and Gluten Free.